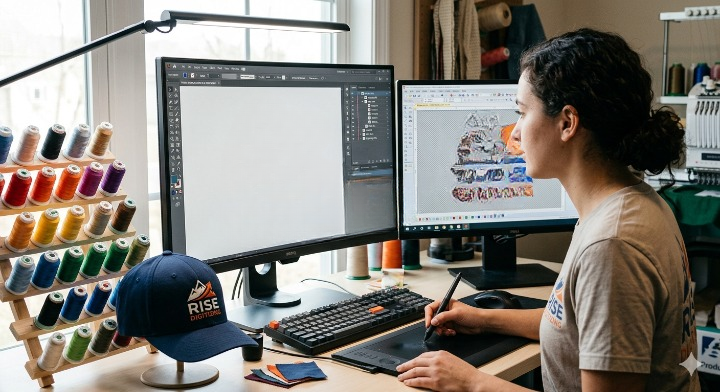
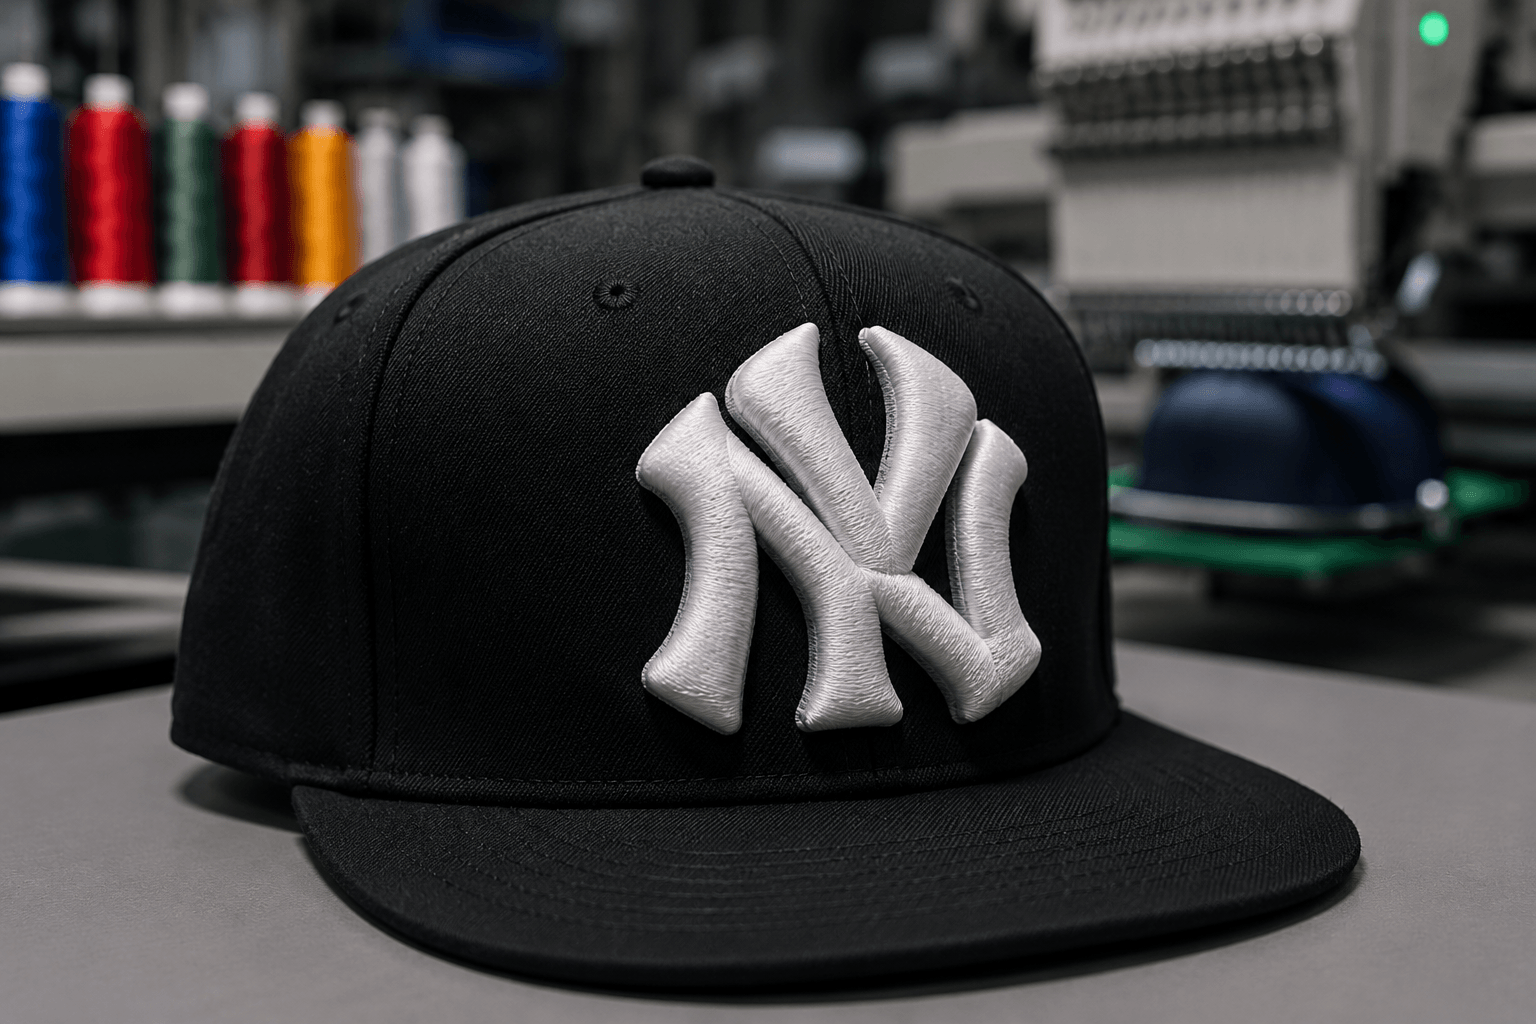

3D puff embroidery on caps is one of the most effective ways to create bold, raised logos and lettering that stand out from traditional flat embroidery. By placing a layer of embroidery foam underneath selected stitches, professionals can give designs a dimensional, premium appearance that works especially well on baseball caps, snapbacks, trucker hats, sports caps, workwear, and branded headwear.
However, achieving clean 3D puff embroidery is not simply a matter of adding foam underneath a regular embroidery design. The artwork must be digitized specifically for puff embroidery, stitch density must be controlled, stitch direction must be planned carefully, and the cap must be hooped and stabilized correctly.
This complete guide explains how 3D puff embroidery on caps works, how to digitize a puff design, which stitches and materials to use, how to embroider the cap step by step, common mistakes to avoid, and how professionals can achieve clean and consistent results.
What Is 3D Puff Embroidery on Caps?
3D puff embroidery is an embroidery technique that creates a raised, three-dimensional effect by placing embroidery foam underneath the stitching. When the embroidery machine sews over the foam, the stitches compress and secure the foam. After stitching is complete, the excess foam around the design is removed, leaving the selected portions of the artwork raised above the surface.
Unlike conventional flat embroidery, which remains relatively level with the fabric, puff embroidery creates additional height and texture.
The technique is particularly popular for:
- Baseball caps
- Snapback hats
- Trucker caps
- Sports team hats
- Corporate caps
- Promotional headwear
- Streetwear
- Club and organization hats
- Custom logo hats
- Branded uniforms
For a broader introduction to puff embroidery, see our guide to what 3D puff embroidery digitizing is.
Quick Answer: How Does 3D Puff Embroidery Work?
3D puff embroidery works by placing embroidery foam underneath specially digitized stitches. The stitches cover and compress the foam, while the excess foam is removed after stitching to leave a raised design.
The most important point for professionals is that a standard flat embroidery file should not simply be converted into a puff design. 3D puff embroidery requires specialized digitizing and stitch planning.
3D Puff Embroidery vs. Flat Embroidery
Before creating a puff design, it is important to understand the difference between traditional embroidery and 3D puff embroidery.
| Feature | Flat Embroidery | 3D Puff Embroidery |
|---|---|---|
| Surface | Relatively flat | Raised and dimensional |
| Foam | Usually not required | Required |
| Digitizing | Standard embroidery digitizing | Specialized puff digitizing |
| Best for | Detailed artwork | Bold logos and lettering |
| Small details | Can handle more detail | Limited by foam and stitch size |
| Visual impact | Professional | Bold and high-impact |
| Common use | Shirts, jackets, polos | Caps, hats, streetwear |
Flat embroidery is often better for intricate artwork containing small details, gradients, and fine lettering. Puff embroidery is generally more effective when the goal is a bold, clean, dimensional appearance.
If you are deciding between embroidery and other apparel decoration methods, our DTF vs. screen printing vs. embroidery guide provides a useful comparison.
Why 3D Puff Embroidery Is Popular on Caps
Caps are one of the best applications for 3D puff embroidery because their front panels provide a strong visual surface for bold raised designs.
A successful puff logo can:
- Make a brand logo more noticeable
- Create a premium appearance
- Add texture and depth
- Increase visual contrast
- Give promotional caps a more professional finish
- Make sports and team logos stand out
- Create a distinctive streetwear aesthetic
Raised embroidery is particularly effective for logos containing large letters, simple symbols, initials, and bold shapes.
For businesses producing customized headwear, custom embroidery baseball hats can also be a useful starting point when planning a larger cap embroidery project.
Step-by-Step Guide to 3D Puff Embroidery on Caps
Step 1: Choose the Right Artwork
The quality of the final puff embroidery starts with the artwork.
Not every logo is suitable for 3D puff embroidery. The best designs typically have:
- Bold lettering
- Simple shapes
- Strong outlines
- Adequate spacing
- Limited small details
- Thick columns
- Clearly defined design elements
For example, a simple company name with thick lettering may work extremely well as a puff design.
A highly detailed photographic image with tiny text and many color transitions is usually a poor candidate for traditional 3D puff embroidery.
If your starting artwork is a JPG or PNG, you may first need vector artwork or professional digitizing. Learn more about vector art conversion from JPG and PNG before preparing the design for embroidery.
Step 2: Decide Which Parts Should Have the Puff Effect
One of the most important professional decisions is determining which elements should actually be raised.
You do not necessarily need to apply foam to the entire design.
For example, a cap could contain:
- Raised company initials
- Flat embroidered borders
- Flat decorative elements
- Raised central lettering
- Flat secondary text
Selective puff embroidery can create more visual depth than making every component raised.
A common professional approach is to use 3D puff for the primary visual element and standard embroidery for supporting details.
Step 3: Prepare the Design for Puff Digitizing
Puff embroidery requires a specialized embroidery file.
The digitizer must consider:
- Stitch direction
- Stitch density
- Underlay
- Satin columns
- Pull compensation
- Stitch length
- Foam thickness
- Design dimensions
- Cap curvature
- Needle penetration
- Start and stop points
- Stitch sequencing
This is why professional embroidery digitizing is so important.
Our complete guide to embroidery digitizing explains how artwork is converted into machine-readable embroidery instructions.
The goal is not simply to trace the artwork. The goal is to create a stitch plan that behaves correctly when sewn onto a curved cap.
Step 4: Keep Puff Elements Bold and Large Enough
Small details are one of the biggest challenges in puff embroidery.
Because foam needs sufficient coverage and must be removed after stitching, extremely small shapes may not produce a clean raised effect.
For this reason, professionals should avoid:
- Very thin lines
- Tiny lettering
- Extremely narrow gaps
- Small isolated details
- Complicated interior shapes
- Excessively tight spacing
Large, bold lettering generally produces a much cleaner result.
The exact minimum size depends on the design, font, foam thickness, stitch type, machine setup, and cap material, so professional testing is recommended rather than relying on a single universal measurement.
Step 5: Select the Correct Embroidery Foam
Embroidery foam is available in different thicknesses and colors.
Common considerations include:
- Foam thickness
- Foam density
- Foam flexibility
- Foam color
- Cap material
- Desired design height
- Stitch coverage
The foam should be compatible with the embroidery application.
A thicker foam can create a stronger dimensional effect, but excessive height can also make the design more difficult to stitch cleanly.
For most professional applications, the objective is not simply maximum height. The objective is controlled height with clean stitch coverage.
Step 6: Choose the Right Cap
Not every cap behaves the same way during embroidery.
Important variables include:
- Fabric composition
- Front-panel structure
- Crown height
- Seam placement
- Cap stiffness
- Curvature
- Material thickness
- Backing requirements
Structured caps often provide a more stable surface for bold puff embroidery, although experienced embroiderers can work with a variety of headwear styles.
Before producing a large order, test the design on the actual cap style that will be used for production.
Step 7: Use Appropriate Stabilization
Stabilization helps control movement during stitching.
Because caps have a curved and sometimes difficult-to-hoop structure, inadequate stabilization can result in:
- Misalignment
- Distorted lettering
- Poor registration
- Uneven stitches
- Wrinkling
- Design shifting
The appropriate backing depends on the cap material, design size, machine, hooping method, and production requirements.
A professional should test stabilization rather than assuming that the same backing combination will work for every cap.
Step 8: Hoop the Cap Correctly
Hooping is one of the most important parts of cap embroidery.
The cap must be positioned so that:
- The design is centered correctly.
- The front panel is secure.
- The cap does not shift during stitching.
- The needle can access the embroidery area safely.
- The design remains aligned with the intended placement.
Cap frames and specialized cap hoops are commonly used for commercial embroidery machines.
The exact hooping method depends on the embroidery machine and cap frame being used.
If the cap moves during production, even a perfectly digitized design can produce poor results.
Step 9: Position the Foam
Place the embroidery foam over the area where the puff design will be stitched.
The foam should cover the intended design area adequately.
Avoid placing unnecessary foam across unrelated areas because excess material can make cleanup more difficult.
Many professionals use foam that contrasts with the thread color because it makes leftover foam easier to identify and remove.
Step 10: Start the Embroidery Machine
Once the cap is hooped, stabilized, and the foam is positioned correctly, load the appropriate embroidery file.
The file format depends on the embroidery machine.
Common embroidery formats include:
- DST
- PES
- JEF
- VP3
- EXP
- XXX
- HUS
For a more detailed explanation, read our guide to DST vs. PES vs. VP3 embroidery file formats.
You can also review our embroidery file formats guide to understand which files are commonly used by different machines.
Step 11: Stitch the Puff Design
During production, the machine stitches over the foam.
The digitized stitch sequence should be designed specifically for the raised effect.
As the needle penetrates the foam, the stitches gradually compress and secure it.
The final result depends heavily on:
- Stitch density
- Stitch direction
- Stitch type
- Stitch overlap
- Pull compensation
- Foam thickness
- Thread tension
- Machine speed
- Cap stability
This is why auto-digitizing a normal embroidery design and simply placing foam underneath it may not provide professional results.
Step 12: Remove the Excess Foam
After embroidery is complete, carefully remove the excess foam surrounding the raised design.
The goal is to remove the foam that is not secured by embroidery stitches while leaving the foam underneath the intended puff areas.
Professionals may use tools such as:
- Fingers
- Tweezers
- Small foam-removal tools
- Brushes
- Controlled heat techniques where appropriate
Care should be taken not to damage the stitches or cap fabric.
Step 13: Clean Up the Design
After removing the foam, inspect the embroidery carefully.
Look for:
- Loose foam pieces
- Exposed backing
- Uneven edges
- Thread breaks
- Loose threads
- Gaps in coverage
- Poor registration
- Distorted lettering
- Unwanted stitches
A small amount of cleanup can significantly improve the final appearance.
Step 14: Inspect the Finished Cap
Before shipping or selling the cap, inspect it from multiple angles.
Check:
Front View
Does the logo look centered and symmetrical?
Side View
Does the puff effect have consistent height?
Close-Up View
Are the stitch edges clean?
Inside View
Are backing and thread ends properly controlled?
Wear Test
Does the design remain stable when the cap is flexed or handled?
Professional quality control is especially important when producing caps for corporate branding, sports teams, retail products, or large promotional orders.
Best Stitch Types for 3D Puff Embroidery
Satin Stitch
Satin stitches are commonly used for puff embroidery because they can create broad, dense columns that cover the foam effectively.
They are particularly useful for:
- Bold lettering
- Outlines
- Logos
- Large initials
- Thick shapes
The width and density of the satin column need to be appropriate for the design and foam.
Running Stitch
Running stitches are generally better suited to fine details and outlines than large puff areas.
They may be used as supporting elements in a design, but they usually do not provide the same raised coverage as a properly constructed satin column.
Fill Stitch
Fill stitches can be useful for flat portions of a mixed embroidery design.
However, traditional fill areas do not always produce the same clean dimensional appearance as well-planned satin columns over foam.
How to Digitize a 3D Puff Embroidery Design
Professional puff digitizing requires a different approach from conventional flat embroidery.
A simplified workflow looks like this:
Artwork → Design simplification → Puff element selection → Stitch planning → Underlay → Satin columns → Pull compensation → Sequencing → Simulation → Test stitch → Revision → Final embroidery file
The digitizer should think about how the needle will physically interact with the foam and cap.
Important Digitizing Considerations
1. Use Appropriate Column Widths
Columns need enough width to accommodate the foam and create stable coverage.
2. Control Stitch Density
Too little density can leave foam visible.
Too much density can create unnecessary needle penetrations, thread buildup, and production problems.
3. Plan Stitch Direction
Stitch direction influences how the design looks and how the foam is compressed.
4. Add Suitable Underlay
Underlay can help stabilize the embroidery and establish the foundation for the top stitches.
5. Use Pull Compensation
Fabric and foam can behave differently under embroidery tension. Proper compensation can help maintain the intended shape.
6. Sequence the Design Correctly
The order in which elements are stitched can affect registration, thread changes, and the final appearance.
7. Test Before Production
A design that looks perfect on a computer screen may require adjustments after being stitched on an actual cap.
For additional information, see our article on 5 embroidery digitizing mistakes to avoid.
Common 3D Puff Embroidery Mistakes
Mistake 1: Using a Standard Flat Embroidery File
A standard embroidery file may not have the stitch structure required for puff embroidery.
Solution: Create or professionally digitize a dedicated puff embroidery file.
Mistake 2: Using Tiny Text
Small lettering may not produce clean raised edges.
Solution: Use bold fonts and simplify small text wherever possible.
Mistake 3: Making the Design Too Detailed
Tiny details can disappear when foam is introduced.
Solution: Simplify the artwork before digitizing.
Mistake 4: Incorrect Stitch Density
Too little density can expose foam, while excessive density can create thread buildup.
Solution: Optimize density according to the design, foam, thread, cap material, and machine.
Mistake 5: Poor Cap Hooping
Movement during embroidery can cause distorted designs.
Solution: Use an appropriate cap frame and secure the cap correctly.
Mistake 6: Skipping a Test Stitch
A design can behave differently on an actual cap than it does in digitizing software.
Solution: Always test important production designs before running a large order.
Mistake 7: Using Foam That Is Too Thick
Maximum height does not always mean maximum quality.
Solution: Select foam thickness based on the design, cap, and desired visual effect.
Mistake 8: Ignoring Pull Compensation
Large satin columns can change shape as they are stitched.
Solution: Build appropriate compensation into the digitized design and verify it with a test sew-out.
What Size Should a 3D Puff Logo Be on a Cap?
There is no single universal size for every puff logo.
The appropriate size depends on:
- Cap style
- Available embroidery area
- Logo proportions
- Font
- Stitch structure
- Foam thickness
- Machine
- Hoop
- Design complexity
As a general principle, larger and simpler designs are usually better candidates for puff embroidery than small, highly detailed designs.
The design should be large enough for the stitches to form stable columns while remaining proportional to the cap.
What Fonts Work Best for 3D Puff Embroidery?
Bold fonts usually work better than thin decorative fonts.
Good candidates often include:
- Bold sans-serif fonts
- Heavy athletic fonts
- Block lettering
- Strong display fonts
- Thick custom lettering
Avoid extremely thin strokes and intricate script unless the design has been specifically adapted for embroidery.
For branding projects, the original brand font may need to be modified slightly to maintain readability after digitizing.
Can You Use 3D Puff Embroidery on Any Cap?
Not necessarily.
While puff embroidery can be used on many types of caps, the final quality depends on the cap construction and embroidery setup.
Structured baseball caps are often suitable because their front panels provide a relatively stable embroidery surface.
Very soft, thin, heavily curved, or loosely constructed caps can require additional testing and stabilization.
For professional production, test the exact cap style before accepting a large quantity order.
3D Puff Embroidery on Flat-Bill vs. Curved-Bill Caps
Both flat-bill and curved-bill caps can be embroidered, but their geometry can influence the embroidery process.
Flat-Bill Caps
Flat-bill caps may provide a relatively straightforward front-panel surface, depending on construction.
Curved-Bill Caps
Curved caps can introduce additional challenges because the embroidery area follows a curved surface.
Digitizing, hooping, and machine setup should account for the curvature.
The most important factor is not simply the cap style but whether the design and embroidery setup are compatible with the physical shape of the cap.
3D Puff Embroidery vs. 3D Puff Printing
The terms can sometimes be confused, but embroidery and printing are different decoration methods.
3D puff embroidery creates dimension using stitches and embroidery foam.
3D puff printing uses a printing process and specialized ink or material to create a raised surface.
For caps, puff embroidery is particularly recognizable because the raised surface is created from thread rather than printed ink.
If you are comparing different decoration technologies, our embroidery vs. screen printing guide can help explain the differences.
How Much Does 3D Puff Embroidery Cost?
The total cost can vary considerably depending on the project.
Factors include:
- Design complexity
- Number of stitches
- Digitizing requirements
- Number of caps
- Cap quality
- Thread colors
- Production quantity
- Turnaround time
- Required revisions
- Specialty materials
Digitizing is often a separate cost from the physical embroidery.
For additional pricing context, see our guide to embroidery digitizing cost per 1,000 stitches and our broader embroidery digitizing cost guide.
How Many Stitches Does a Puff Embroidery Logo Need?
There is no fixed stitch count for every puff design.
The stitch count depends on:
- Logo dimensions
- Number of elements
- Stitch types
- Column widths
- Density
- Underlay
- Lettering
- Design complexity
A professional digitizer should optimize the stitch count for coverage and durability rather than simply trying to minimize or maximize the number of stitches.
Our guide on how many stitches a logo should have provides more information about stitch-count considerations.
How to Improve 3D Puff Embroidery Quality
For professional production, focus on the complete workflow rather than one setting.
Use High-Quality Artwork
Clean artwork gives the digitizer better control over shapes and proportions.
Simplify the Design
Remove unnecessary details that may not translate well into puff embroidery.
Work With an Experienced Digitizer
Puff embroidery requires specialized stitch planning.
Test the Design
Always evaluate a sample before large-scale production.
Match Foam to the Design
Foam thickness should support the desired dimensional effect without compromising stitch quality.
Maintain Machine Calibration
Thread tension, needle condition, machine speed, and maintenance can all influence production quality.
Inspect Every Production Run
Even an established design can behave differently when the cap material, thread, machine, or production conditions change.
Professional 3D Puff Embroidery Workflow
For businesses producing caps regularly, a standardized workflow can reduce errors.
1. Receive artwork
↓
2. Evaluate artwork for puff suitability
↓
3. Simplify or modify artwork if necessary
↓
4. Digitize the design specifically for 3D puff
↓
5. Select foam and backing
↓
6. Prepare the cap and hoop
↓
7. Run a test sew-out
↓
8. Remove excess foam
↓
9. Inspect and adjust
↓
10. Approve the final design
↓
11. Run production
This workflow helps separate artwork preparation, digitizing, testing, and production instead of treating them as one step.
When Should You Use Professional Puff Digitizing Services?
Professional digitizing is especially valuable when:
- The logo is complex
- The cap order is large
- The design contains custom lettering
- You need consistent production
- The artwork needs substantial cleanup
- Previous puff samples have poor coverage
- You need multiple machine formats
- The design must be reproduced repeatedly
A professionally digitized file can save production time by reducing trial-and-error during embroidery.
If you need professional assistance, explore professional logo digitizing services or learn more about professional embroidery services.
3D Puff Embroidery Quality Checklist
Before approving a puff embroidery cap, check the following:
- Logo is correctly centered
- Puff elements have consistent height
- Foam is not unnecessarily visible
- Stitch coverage is complete
- Edges are clean
- Lettering is readable
- No major thread breaks are visible
- No excessive thread buildup is present
- Cap fabric is not excessively distorted
- Backing is properly controlled
- Design matches the approved artwork
- The sample has been tested before bulk production
Frequently Asked Questions About 3D Puff Embroidery on Caps
What is 3D puff embroidery on a cap?
3D puff embroidery is a raised embroidery technique that uses foam underneath selected stitches to create a dimensional logo or design. It is commonly used for baseball caps, snapbacks, sports hats, and branded headwear.
Can any embroidery design be converted into 3D puff?
Not every design is suitable for puff embroidery. Designs with bold shapes, thick lettering, and limited fine detail generally produce better results. Some artwork must be simplified or redesigned before puff digitizing.
Is 3D puff embroidery better than flat embroidery?
Neither is universally better. Puff embroidery is ideal when you want a bold raised effect, while flat embroidery is generally more flexible for detailed artwork and smaller elements.
What foam is used for 3D puff embroidery?
Special embroidery foam is placed underneath the stitches. Foam thickness and density should be selected according to the design, cap material, desired height, and production requirements.
Can you do 3D puff embroidery on curved caps?
Yes. 3D puff embroidery can be produced on many curved caps, but the cap’s curvature must be considered during hooping, digitizing, and machine setup.
Why is my puff embroidery not raised enough?
Possible causes include unsuitable foam, insufficient stitch coverage, incorrect stitch structure, poor digitizing, excessive compression, or an unsuitable design.
Why can I still see foam around my puff logo?
Visible foam can result from insufficient edge coverage, improper foam placement, unsuitable foam color, or incomplete cleanup after stitching.
What file format is best for 3D puff embroidery?
There is no single universal format. The correct embroidery file depends on the machine being used. Common formats include DST, PES, JEF, VP3, EXP, and others.
Does 3D puff embroidery require special digitizing?
Yes. Professional puff embroidery should be digitized specifically for the raised effect rather than treating it as a standard flat embroidery design.
Is 3D puff embroidery durable?
When properly digitized and embroidered using suitable materials and production techniques, puff embroidery can be durable. Proper care and the quality of the cap, thread, foam, and stitching all influence longevity.
How do professionals get clean 3D puff embroidery results?
Professionals typically combine suitable artwork, specialized puff digitizing, appropriate foam, correct stabilization, accurate hooping, machine setup, test stitching, foam removal, and quality control.
Final Thoughts: Getting Professional 3D Puff Embroidery on Caps
3D puff embroidery can transform an ordinary cap into a bold, premium-looking piece of branded apparel. The raised effect is particularly effective for company logos, sports branding, streetwear, promotional hats, team caps, and custom headwear.
However, professional results depend on more than placing foam under an embroidery needle. Artwork selection, specialized digitizing, stitch density, satin-column construction, pull compensation, stabilization, hooping, foam selection, machine settings, and post-production cleanup all contribute to the final result.
For businesses producing professional-quality caps, the best approach is to treat puff embroidery as a specialized production process from the beginning.
Start with clean artwork, simplify designs where necessary, use a purpose-built 3D puff embroidery file, test the design on the actual cap, and make adjustments before moving into bulk production.
If you are preparing a logo for embroidery, you can also explore our resources on how to digitize a logo for a baseball cap, affordable cap digitizing services, and 3D puff hat digitizing on hats and beanies.
For professional embroidery production, the quality of the digitized file is the foundation of the finished result.
Related Embroidery Resources
Related Posts