
Turning a low-resolution JPG or PNG into clean, usable artwork can seem like a simple file conversion. In reality, vector art conversion is a detailed process that can dramatically improve how a logo, illustration, or brand graphic looks across print, embroidery, apparel, signage, and digital applications.
A JPG or PNG is made from pixels. A vector file, such as SVG, is built from mathematical paths that can be scaled without becoming blurry. When that artwork is eventually used for embroidery, however, another step is required: the vector artwork must be digitized into stitches.
That means JPG to SVG conversion and PNG to embroidery conversion are related, but they are not the same process.
Understanding the difference can help you choose the right file format, avoid poor-quality conversions, and prepare artwork that is ready for professional production.
In this guide, we’ll explain how vector conversion works, when you need JPG to SVG conversion, how PNG artwork can become an embroidery file, and why professional artwork preparation matters.
What Is Vector Art Conversion?
Vector art conversion is the process of recreating or converting raster artwork into a vector-based format.
Raster images such as JPG and PNG consist of individual pixels. When enlarged beyond their original resolution, those pixels can become visible, causing the artwork to look blurry or jagged.
Vector artwork works differently.
Instead of storing an image as a collection of pixels, vector graphics use paths, curves, shapes, and mathematical coordinates. This allows the artwork to be resized while maintaining clean edges.
Common vector formats include:
- SVG
- AI
- EPS
- PDF in certain vector-based workflows
For a more detailed explanation, see What Is a Vector File?.
Why Vector Artwork Matters
A clean vector logo can be used at many different sizes.
For example, the same vector logo could potentially be used for:
- Business cards
- T-shirts
- Signs
- Banners
- Packaging
- Vehicle graphics
- Website graphics
- Embroidery preparation
- Promotional products
Instead of maintaining separate pixel-based files for every size, a properly created vector master can provide much greater flexibility.
JPG vs. PNG vs. SVG: What’s the Difference?
Before discussing conversion, it helps to understand the difference between these formats.
JPG
JPG is a raster image format commonly used for photographs and compressed graphics.
Its advantages include:
- Small file sizes
- Broad compatibility
- Good support for photographs
- Easy sharing
However, JPG uses lossy compression, which can introduce artifacts around edges and text.
This can make it a poor source for detailed logo reproduction when the available JPG is low resolution.
PNG
PNG is also a raster format, but it can preserve transparency and generally works well for logos, illustrations, screenshots, and graphics.
PNG is particularly useful when you need a transparent background.
However, PNG is still pixel-based.
Increasing the size of a small PNG can result in:
- Blurry edges
- Pixelation
- Jagged curves
- Loss of fine detail
SVG
SVG is a vector format.
Because it uses scalable paths rather than fixed pixels, an SVG can be resized much more effectively without the same type of pixelation associated with raster images.
This makes SVG particularly useful for logos and graphics that need to appear at multiple sizes.
For additional information about SVG and embroidery workflows, see SVG to Embroidery File.
What Is JPG to SVG Conversion?
JPG to SVG conversion involves recreating raster artwork as vector artwork.
This is important because JPG files do not contain vector paths.
A conversion process may involve:
- Reviewing the original JPG.
- Cleaning the artwork.
- Identifying shapes and outlines.
- Recreating curves and paths.
- Rebuilding typography where necessary.
- Separating colors and design elements.
- Creating the final vector artwork.
- Exporting it as SVG or another appropriate vector format.
For simple artwork, automated tracing may produce a usable starting point.
For professional logos, however, manual refinement is often necessary.
A poorly traced logo can contain:
- Excessive anchor points
- Uneven curves
- Broken shapes
- Incorrect proportions
- Unwanted artifacts
- Inaccurate colors
The goal is not merely to change .jpg into .svg.
The goal is to create clean, usable vector artwork.
If you’re starting with a JPG, see How to Convert From JPG to Vector.
Can You Convert PNG to SVG?
Yes, PNG artwork can be converted or recreated as SVG.
However, the quality of the original PNG makes a significant difference.
A high-resolution PNG with clean shapes may provide a useful starting point.
A tiny, blurry PNG may require much more manual reconstruction.
For example, imagine you have a company logo that is only 300 pixels wide. If the logo contains small text and detailed curves, simply enlarging it will not create additional information.
A professional vector artist may instead recreate the logo using:
- Bézier curves
- Vector shapes
- Clean outlines
- Rebuilt typography
- Separate color elements
This produces a genuine vector version rather than a stretched raster image.
Is JPG to SVG the Same as Vectorization?
Not always.
The terms are often used together, but the quality of the result depends on how the conversion is performed.
Automatic tracing may quickly create vector paths around pixels.
Professional vectorization may involve manually rebuilding and refining the artwork.
For simple icons, automatic tracing may be sufficient.
For logos, detailed illustrations, and commercial artwork, manual refinement can produce a much cleaner result.
This is particularly important when the artwork will later be printed, embroidered, enlarged, or used for branding.
Why Low-Resolution Logos Need Vector Conversion
Many businesses have their logo in an old JPG or PNG file.
It may look acceptable when viewed on a computer screen, but problems become obvious when the logo needs to be enlarged.
For example, a logo might be used on:
- A large banner
- Store signage
- Vehicle graphics
- A trade-show display
- Embroidered apparel
- Promotional merchandise
A small raster image can quickly lose quality in these situations.
Vector conversion gives the artwork a cleaner foundation for future production.
This is one reason businesses should consider maintaining a professional vector master of their logo.
What Happens During Professional Vector Art Conversion?
A professional vector conversion process typically begins with an inspection of the source artwork.
The designer looks at:
- Resolution
- Image quality
- Shape complexity
- Typography
- Color count
- Background
- Fine details
- Existing artifacts
The artwork can then be reconstructed into vector paths.
Step 1: Review the Source Image
The original JPG or PNG is examined to determine what can be traced and what needs to be recreated manually.
A clean source image generally requires less reconstruction.
Step 2: Remove Unwanted Background Elements
If the artwork contains a background that is not part of the logo, it may need to be removed.
This is especially important when preparing artwork for apparel or embroidery.
Step 3: Recreate Shapes
The major design elements are rebuilt using vector paths and shapes.
Curves need to be smooth, and corners need to be properly controlled.
Step 4: Rebuild Text
Small or distorted text may need to be recreated rather than simply traced.
Font selection and letter spacing can also affect the final result.
Step 5: Recreate Colors
The designer identifies the intended colors and separates the artwork into clean, editable elements.
Step 6: Refine the Artwork
The vector file is reviewed for:
- Uneven curves
- Excessive anchor points
- Gaps
- Overlapping shapes
- Incorrect proportions
- Unwanted artifacts
Step 7: Export the Final Vector File
The completed artwork can then be supplied in an appropriate vector format such as SVG, AI, or EPS depending on the customer’s requirements.
What Is PNG to Embroidery Conversion?
PNG to embroidery conversion is different from PNG to SVG conversion.
A PNG is a raster image.
An embroidery machine does not stitch pixels.
It follows a machine embroidery file containing instructions about how and where stitches should be placed.
Therefore, the workflow generally looks like this:
PNG artwork → artwork preparation → embroidery digitizing → machine-ready embroidery file
The final file might be:
- DST
- PES
- JEF
- VP3
- Or another format compatible with the embroidery machine
For more information, read How to Convert PNG to DST.
Why PNG Cannot Simply Be Renamed as an Embroidery File
Changing the extension of a PNG does not turn it into an embroidery file.
For example:
logo.png
cannot simply become:
logo.dst
by renaming the file.
The PNG contains pixels.
The embroidery file needs stitch instructions.
The digitizer has to determine:
- Stitch types
- Stitch direction
- Stitch density
- Underlay
- Stitch sequence
- Thread colors
- Trims
- Jumps
- Pull compensation
- Design dimensions
This is why embroidery conversion should be understood as digitizing, not simple file renaming.
Our complete guide to embroidery digitizing explains this process in greater detail.
Vector Conversion vs. Embroidery Digitizing
This is one of the most important distinctions to understand.
Vector Conversion
Vector conversion transforms raster artwork into scalable vector artwork.
Example:
JPG → SVG
The final product is a vector graphic.
Embroidery Digitizing
Embroidery digitizing transforms artwork into stitch instructions.
Example:
PNG/SVG → DST
The final product is a machine embroidery file.
These processes can work together, but one does not replace the other.
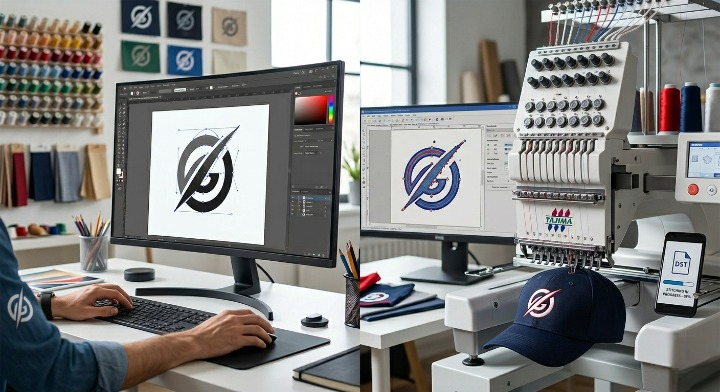
A Typical Professional Workflow
For a business logo, the process might look like:
Low-resolution JPG
↓
Vector artwork recreated
↓
Clean SVG/AI/EPS
↓
Embroidery digitizing
↓
DST/PES/JEF/etc.
↓
Machine embroidery
This workflow helps ensure that the artwork is clean before it is translated into stitches.
For a detailed comparison, see What Is the Difference Between Vector Conversion and Embroidery Digitizing?.
Why Vector Artwork Is Useful for Embroidery
Vector artwork is not itself an embroidery file, but it can be an excellent source for digitizing.
A clean vector logo gives the digitizer clearly defined:
- Shapes
- Outlines
- Curves
- Text
- Color areas
This can make it easier to understand how the design should be constructed as embroidery.
However, even a perfect SVG still needs professional digitizing before it can be stitched.
A vector file describes what the artwork looks like.
An embroidery file describes how the machine should stitch it.
Can Every JPG or PNG Be Converted to SVG?
Technically, almost any raster image can be traced or recreated as vector artwork.
But that does not mean every image will produce a useful vector file automatically.
The complexity of the image matters.
Simple Logos
A simple logo with:
- Two or three colors
- Clean shapes
- Minimal text
- Strong outlines
may be relatively straightforward to vectorize.
Complex Images
Photographs and highly detailed artwork are much more difficult.
A photograph can contain thousands of colors, subtle gradients, textures, and shadows.
Trying to reproduce all of that as traditional vector artwork may create an unnecessarily complicated file.
For these situations, the intended production method should be considered before conversion.
What About Photographs?
Photographs are usually not ideal candidates for traditional logo-style vectorization.
If you want to turn a photograph into embroidery, the process is different from converting a simple logo.
A digitizer may need to simplify the image and decide which visual details can realistically be represented using thread.
For photo-based embroidery, specialized workflows may be required.
If you’re interested in image-based embroidery, see How to Digitize a Picture for Embroidery.
How Vector Conversion Helps Screen Printing
Vector artwork is also valuable for apparel printing.
Clean vector graphics can make it easier to produce sharp artwork for certain printing processes.
For example, logos used for:
- Screen printing
- Promotional apparel
- Signage
- Labels
- Packaging
may benefit from clean scalable artwork.
If you are comparing apparel decoration methods, see DTF Printing vs. Screen Printing vs. Embroidery.
Vector Art Conversion for Business Logos
Businesses frequently need vector conversion because their original logo files are not production-ready.
A company might only have a logo saved as:
company-logo.jpg
But a printer, embroiderer, sign company, or designer may request:
- SVG
- AI
- EPS
Having a clean vector master makes future branding projects much easier.
Instead of asking a designer to recreate the logo every time, the business can provide the vector master whenever it is needed.
What File Should You Send for Vector Conversion?
If you only have a JPG or PNG, send the highest-quality version available.
Useful source files may include:
- High-resolution JPG
- High-resolution PNG
- Existing PDF
- Screenshot
- Photograph of printed artwork
If you have an old business card or printed logo but no digital artwork, a designer may still be able to reconstruct it.
The better the source material, the easier it generally is to reproduce the artwork accurately.
What File Should You Send for Embroidery Digitizing?
For embroidery, provide:
- Your original artwork.
- The desired embroidery size.
- The garment or material.
- The placement.
- Your machine information.
- The required embroidery format.
- Any brand color requirements.
If you already have vector artwork, send it along with the other information.
If you only have a JPG or PNG, a professional digitizer can determine whether additional artwork preparation is necessary.
Common Problems With Poor Vector Conversion
Not all vector conversions produce professional results.
Poor-quality conversion can create:
Too Many Anchor Points
Automatic tracing may generate hundreds or thousands of unnecessary points.
This can make the artwork difficult to edit.
Uneven Curves
Curves may look wavy or inconsistent instead of smooth.
Broken Shapes
Small gaps can appear where shapes should connect.
Incorrect Text
Fonts may be traced inaccurately or become distorted.
Unwanted Background
A background may accidentally become part of the vector artwork.
Incorrect Colors
Colors can change during conversion or be separated incorrectly.
Professional cleanup helps address these issues.
Common Problems With Poor PNG-to-Embroidery Conversion
The same principle applies to embroidery.
An automatic conversion may produce:
- Excessive stitches
- Poor stitch density
- Incorrect sequencing
- Weak underlay
- Tiny unreadable details
- Thread buildup
- Poor registration
- Excessive jumps
- Unnecessary trims
The resulting file may technically open on an embroidery machine but still produce poor-quality stitching.
That is why professional digitizing matters.
For additional guidance, see 5 Embroidery Digitizing Mistakes to Avoid.
JPG to SVG vs. PNG to Embroidery: Which Do You Need?
The answer depends on what you are trying to produce.
| Your Goal | Recommended Process |
|---|---|
| Create scalable logo artwork | JPG/PNG → SVG |
| Prepare artwork for printing | Vector conversion |
| Prepare a logo for embroidery | Embroidery digitizing |
| Create a DST file | Artwork → digitizing → DST |
| Create a PES file | Artwork → digitizing → PES |
| Create scalable artwork before digitizing | JPG/PNG → vector |
| Improve an old logo | Professional vector recreation |
If your final goal is embroidery, you do not necessarily need to convert your PNG to SVG first.
A professional digitizer can often work directly from suitable raster artwork.
However, if the source artwork is poor or you also need scalable branding artwork, vector conversion may be worthwhile.
When Should You Hire a Professional?
DIY tools can be useful for learning and simple projects.
However, professional conversion is worth considering when:
- The artwork represents your business.
- The logo will be used commercially.
- The source image is low resolution.
- You need accurate typography.
- The design contains complex shapes.
- The artwork will be enlarged.
- The design will be embroidered.
- You need consistent branding.
- You need multiple file formats.
- You need production-ready artwork.
For businesses that regularly need clean artwork, Vector Art Conversion Services can provide a more reliable solution than repeatedly working from low-resolution images.
How to Prepare Artwork for Professional Conversion
Before submitting your artwork, try to provide as much information as possible.
Provide the Original File
Do not repeatedly screenshot or compress the logo if you have the original.
Explain the Intended Use
Tell the designer whether the artwork will be used for:
- Embroidery
- Screen printing
- Apparel
- Signage
- Web graphics
- Packaging
- Promotional products
Specify Required Formats
For example:
SVG + AI + EPS
or:
DST + PES
Provide Brand Colors
If the logo has exact brand colors, provide the relevant color information where possible.
Mention the Final Size
A logo intended for a small left-chest embroidery may need different treatment from a large printed banner.
How to Convert JPG to SVG for Embroidery Preparation
If your final goal is embroidery, a possible workflow is:
Step 1: Start With the Best JPG Available
Use the highest-resolution source you have.
Step 2: Clean the Artwork
Remove backgrounds, artifacts, and unnecessary elements.
Step 3: Vectorize the Logo
Recreate the artwork as clean vector paths.
Step 4: Review the Vector
Check curves, text, spacing, colors, and proportions.
Step 5: Prepare for Digitizing
The vector artwork can now be supplied as a cleaner source for embroidery digitizing.
Step 6: Digitize the Design
The artwork is converted into stitch instructions.
Step 7: Export the Required Machine Format
The final design can be exported into a compatible embroidery format such as DST, PES, JEF, or another required format.
Step 8: Test the Design
A sample stitch-out can reveal problems that are not obvious on a computer screen.
Why Testing Matters
A design can look perfect digitally and still behave differently when stitched.
Embroidery involves:
- Fabric movement
- Thread tension
- Stitch buildup
- Needle penetration
- Stabilizer
- Garment construction
A test stitch-out can reveal whether the design needs adjustment.
This is especially important for:
- Small text
- Dense logos
- Fine outlines
- Detailed artwork
- Caps
- Stretch fabrics
- Large designs
Testing helps bridge the gap between digital artwork and physical production.
The Role of Vector Artwork in Professional Branding
A clean vector master can become one of the most useful files a business owns.
It can support future:
- Embroidery
- Screen printing
- Signs
- Packaging
- Advertising
- Website graphics
- Promotional products
- Apparel design
Instead of relying on a low-resolution JPG every time the logo is needed, you have a scalable source file that can be adapted to different applications.
For businesses building a professional brand identity, vector artwork is therefore much more than a file-format upgrade.
It is a long-term branding asset.
Final Thoughts
Vector art conversion is not simply changing a JPG or PNG into another file extension.
A quality conversion involves recreating artwork as clean, scalable vector paths that can be edited and reproduced across different applications.
When embroidery is the final goal, there is another important step.
The vector or raster artwork must be digitized into stitches so that an embroidery machine knows exactly how to reproduce the design.
The basic workflow is:
JPG/PNG → Vector Artwork → Embroidery Digitizing → Machine-Ready File
But not every project requires every step.
A simple PNG logo may be suitable for direct digitizing, while a poor-quality JPG may benefit from professional vector reconstruction first.
The right workflow depends on the artwork, intended use, final size, and production method.
If you need clean artwork for branding or want to prepare a logo for machine embroidery, Rise Digitizing can help with both vector artwork conversion and professional embroidery digitizing.
The goal is simple: start with better artwork, use the right file format, and create a production-ready design that looks professional wherever it is used.
Frequently Asked Questions
What is vector art conversion?
Vector art conversion is the process of recreating raster artwork such as JPG or PNG as scalable vector artwork, typically in formats such as SVG, AI, or EPS.
Can a JPG be converted to SVG?
Yes. A JPG can be traced or manually recreated as vector artwork. Professional conversion may involve cleaning and rebuilding shapes rather than simply using automatic tracing.
Can PNG be converted to embroidery?
Yes, but PNG is not an embroidery file. The artwork needs to be digitized into stitches and exported into a compatible machine format.
Is SVG an embroidery file?
No. SVG is a vector graphics format. It can be used as source artwork for embroidery digitizing, but an embroidery machine generally requires a machine-specific embroidery file.
What is the difference between SVG and DST?
SVG contains vector artwork made from paths and shapes. DST is a machine embroidery format containing stitch-related instructions.
Do I need to convert PNG to SVG before embroidery digitizing?
Not always. A professional digitizer may be able to work directly from a suitable PNG. Vector conversion can be useful when the original artwork is low quality or when you also need scalable branding artwork.
What is the best format for a logo?
For scalable graphic artwork, SVG, AI, or EPS can be useful depending on the application. For embroidery, the correct machine format depends on the embroidery equipment.
Why does my converted vector look different from the original JPG?
Automatic tracing can interpret pixels imperfectly. Manual cleanup and vector reconstruction may be necessary to reproduce the original logo accurately.
Can I convert a photograph into vector artwork?
It is possible, but photographs are much more complex than simple logos. A traditional vector recreation may require significant simplification.
Can I use a vector logo directly in an embroidery machine?
No. A vector logo still needs to be digitized into stitches and exported into a machine-compatible embroidery format.
Related Resources
For more information about vector conversion and embroidery digitizing, explore:
- What Is a Vector File?
- How to Convert From JPG to Vector
- Vector Conversion and Embroidery Digitizing
- SVG to Embroidery File
- Convert SVG to Embroidery File Free
- How to Convert PNG to DST
- What Is the Difference Between Vector Conversion and Embroidery Digitizing?
- Complete Guide to Embroidery Digitizing
Related Posts