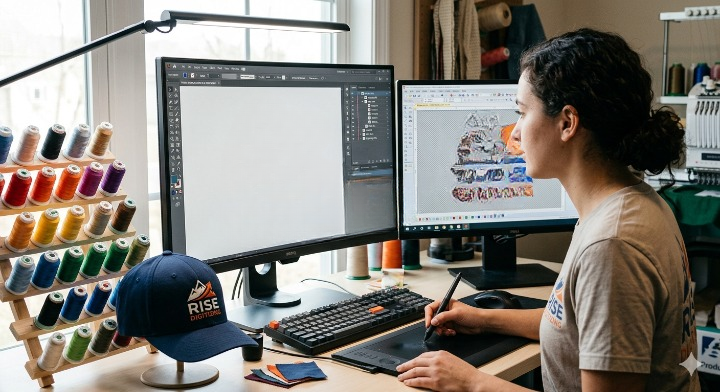

Caps are one of the hardest things in embroidery to get right — not because the artwork is complicated, but because the surface isn’t flat. A curved, structured cap panel behaves completely differently under a needle than a t-shirt or a flat patch, and a logo that looks perfect digitized for apparel can come out warped, gapped, or unreadable once it’s stitched onto a hat.
Here’s exactly what digitizing a logo for a baseball cap involves, whether you’re doing it yourself in embroidery software or briefing a digitizer to do it for you.
What “Digitizing” Actually Means
Digitizing converts artwork — a logo, wordmark, or graphic — into a stitch file the embroidery machine can read. That file doesn’t just contain the image; it contains instructions: stitch type, stitch direction, density, underlay, color sequence, and trim points. A digitized cap file is essentially a set of machine directions built specifically around the shape and structure of a cap panel.
This is different from digitizing for a flat garment. Caps need their own settings because of how the fabric moves on the machine.
Why Caps Are Different From Flat Embroidery
- Curved surface — Cap fronts sit on a curved panel, so designs need to be digitized to “wrap” correctly rather than sit flat.
- Limited hoop space — Cap hoops are smaller and shaped differently than standard embroidery hoops, which limits design width and height.
- Structured foam front — Many caps have a foam layer between the fabric and lining, which affects tension and can cause puckering if density isn’t adjusted.
- Seam interference — The center seam on structured caps can distort a design that crosses it if the digitizing doesn’t account for it.
Ignoring any of this is the most common reason cap embroidery comes out warped or with visible pulling around the edges.
Step 1: Start With a Clean Vector File
Before digitizing even begins, the source artwork matters. Vector formats — AI, EPS, or PDF — give the cleanest starting point because the shapes and colors are mathematically defined rather than made of pixels. If all you have is a JPEG or PNG, it needs to be high resolution, or the digitizer will end up manually rebuilding the shapes from scratch, which increases both time and error.
Simplify before you digitize. Fine gradients, thin script fonts, and tiny text under roughly 5–6mm tend to close up or blur once stitched, especially on the smaller real estate of a cap front. If the logo has fine detail, consider a simplified version specifically for embroidery.
Step 2: Choose the Right Cap Placement and Size
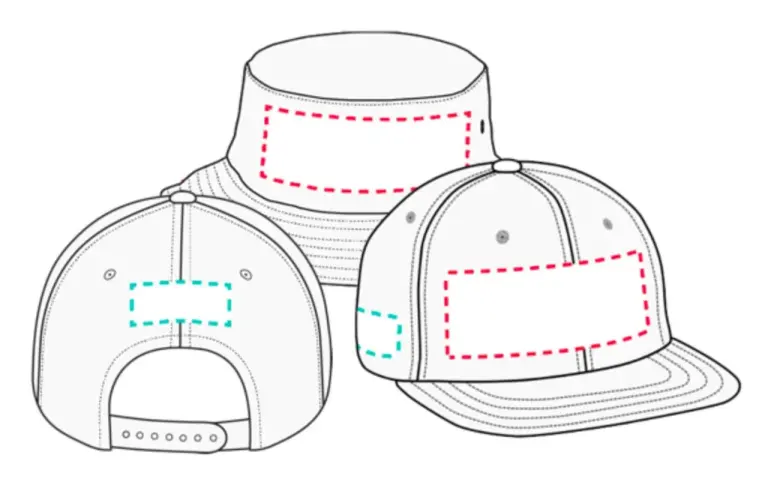
Standard cap logo placements:
- Front panel — The most common spot, typically 2.5–3 inches wide depending on cap style.
- Side panel — Smaller, usually reserved for a secondary mark or text.
- Back panel — Used for a strap-adjacent design, often smaller and simpler.
The size constraint changes the digitizing approach. A logo that works at full size on a jacket often needs elements removed, merged, or resized specifically for a 2.5-inch cap front so it doesn’t lose legibility.
Step 3: Set Up the Design for a Curved Surface
This is where cap digitizing diverges most from flat garment work:
- Digitize on a curved template, not a flat one, so software accounts for how the design will sit once the cap curves around the machine’s cap frame.
- Adjust stitch direction so it follows the natural curve of the cap rather than running straight across it — this reduces puckering and keeps the design sitting flat against the fabric.
- Increase underlay stitching slightly compared to flat garments, since the foam front needs extra stabilization to prevent shifting.
Step 4: Choose the Right Stitch Types and Density
- Satin stitches work well for lettering, borders, and thin shapes.
- Fill stitches cover larger solid areas but need careful density settings on caps — too dense and the fabric puckers; too loose and the backing shows through.
- 3D puff (foam embroidery) adds raised, dimensional lettering or shapes — a popular choice for cap fronts because it stands out even from a distance. This requires its own digitizing approach since the foam layer changes stitch density and trim points.
Step 5: Pick Thread Colors and Finalize the Color Sequence
Match Pantone or brand colors to the closest available embroidery thread chart, and sequence colors to minimize thread changes and trims — this keeps production time (and cost) down without changing how the finished logo looks.
Step 6: Test-Stitch Before Full Production
Always run a test stitch-out on a similar cap material before committing to a full production run. This catches:
- Puckering or fabric distortion
- Thread color mismatches
- Text that’s too small to read clearly
- Density issues around the seam
A single test cap costs far less than discovering a digitizing issue after 200 caps are already stitched.
Common Mistakes to Avoid
- Digitizing on a flat template and expecting it to translate directly to a curved cap frame
- Using apparel-level density settings on a cap front, causing puckering
- Keeping text or fine detail too small for the finished cap size
- Skipping the test stitch to save time, then having to redo an entire batch
DIY vs. Hiring a Digitizer
If you’re comfortable in embroidery software (Wilcom, Hatch, Pulse) and only need occasional caps digitized, doing it yourself is workable — but the learning curve around curved surfaces and density settings is real. For businesses ordering caps regularly, or for a logo that needs to look sharp on the first run, working with an experienced cap digitizer is usually faster and cheaper than trial-and-error test runs.
FAQ
What file format should I send for cap logo digitizing? Vector formats (AI, EPS, PDF) give the best results. High-resolution JPEG or PNG files also work if a vector isn’t available.
How small can text be on a digitized cap logo? Generally, text should stay above roughly 5–6mm in height to stitch cleanly — smaller text tends to blur or close up.
What is 3D puff digitizing? It’s a technique that uses foam under the stitching to create raised, dimensional lettering or shapes — commonly used for bold cap-front logos.
Do I need a different file for caps than for jackets or shirts? Yes. Cap files are digitized specifically around the curved cap frame and foam front, so a file digitized for a flat garment won’t stitch correctly on a cap.
How long does cap logo digitizing take? Turnaround typically ranges from a few hours to a couple of days depending on design complexity and revisions.
Get Your Logo Digitized for Caps
If you’d rather skip the trial-and-error, Rise Digitizing’s cap and hat digitizing service handles the curved-panel setup, density adjustments, and test-ready files for you — including 3D puff digitizing for raised cap-front logos. Get a free quote to see pricing for your design.
Related Posts