
Embroidery digitizing is not a one-size-fits-all process. The same logo can produce excellent results on a structured cap but look distorted, overly dense, or poorly registered when stitched on a T-shirt, jacket, or embroidered patch.
The reason is simple: different garments and embroidery products behave differently under the needle. Fabric weight, stretch, thickness, surface texture, curvature, stabilization, hooping, design size, stitch density, underlay, and even the intended wearing conditions can affect the final embroidery.
For professional embroidery production, the artwork must therefore be digitized specifically for the item being embroidered.
This complete guide explains how embroidery digitizing differs for hats, T-shirts, jackets, and patches, what stitch types work best for each application, how to choose stabilizers, which design mistakes to avoid, and how professional digitizers adapt one logo for multiple garments.
Whether you run an embroidery business, create branded apparel, sell custom merchandise, or outsource embroidery digitizing, understanding these differences can help you achieve cleaner stitches, better registration, improved durability, and more consistent results.
What Is Embroidery Digitizing?
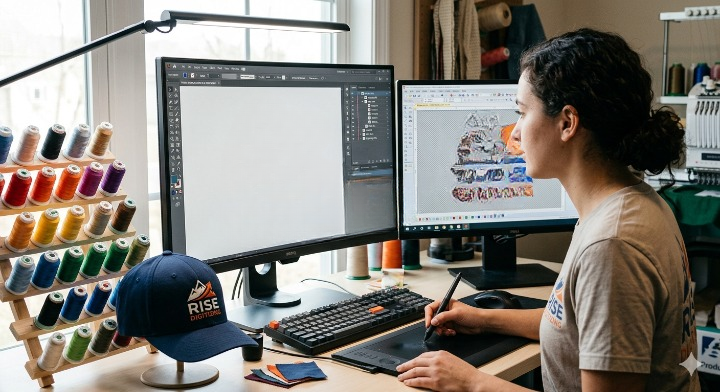
Embroidery digitizing is the process of converting artwork into a machine-readable embroidery file containing instructions for stitches, stitch direction, density, sequencing, thread changes, trims, and other machine movements.
An embroidery machine does not simply “read” a JPG, PNG, or ordinary image and reproduce it as stitches.
Instead, the digitizer determines:
- Where stitches should begin and end
- Which stitch types should be used
- Stitch direction
- Stitch density
- Underlay structure
- Pull compensation
- Stitch sequencing
- Thread colors
- Machine stops
- Trims
- Design dimensions
- Registration requirements
This is why professional embroidery digitizing is fundamentally different from simply converting an image into a file.
For a deeper explanation, see our complete guide to embroidery digitizing.
Quick Answer: Why Does Digitizing Change by Garment?
Embroidery designs must be digitized differently for hats, T-shirts, jackets, and patches because each surface has different physical characteristics.
A hat is curved and often structured. A T-shirt is flexible and can stretch. A jacket may contain thick or layered material. A patch requires its own border, edge structure, backing, and finishing method.
Therefore, one embroidery file may not be ideal for every garment.
Why One Embroidery File Does Not Always Work for Every Garment
A common misconception is that once a logo has been digitized, the same file can be used on every product.
In reality, professional embroidery often requires adjustments or separate versions of the same design.
Consider a company logo embroidered on:
- A baseball cap
- A cotton T-shirt
- A fleece jacket
- An embroidered patch
The artwork may remain identical, but the stitch strategy may need to change.
For example:
Cap: The design must accommodate curvature and limited embroidery space.
T-shirt: The design must account for a soft, flexible surface and potential fabric movement.
Jacket: The digitizer may need to deal with heavier fabric, seams, lining, or thicker construction.
Patch: The design needs to work with the patch material and usually requires a strong border and clean edge finishing.
This garment-specific approach is one of the foundations of professional embroidery production.
Hats vs T-Shirts vs Jackets vs Patches: Quick Comparison
| Factor | Hats | T-Shirts | Jackets | Patches |
|---|---|---|---|---|
| Surface | Curved | Flexible | Often thick/layered | Flat or semi-rigid |
| Main challenge | Curvature | Stretch and distortion | Thickness/seams | Border and edge quality |
| Stabilization | Important | Very important | Depends on material | Patch backing/material |
| Design size | Usually limited | More flexible | Often larger | Depends on patch |
| Best designs | Bold/simple | Detailed but controlled | Medium to large | Bold, defined shapes |
| Common stitch types | Satin, fill, running | Satin, fill, running | Satin, fill, appliqué | Satin, fill, border |
| Registration risk | High | Medium to high | Medium | Medium |
| Special consideration | Cap frame | Fabric stretch | Seams/layers | Edge finishing |
The key lesson is that digitizing should be designed around the final product, not just the artwork.
Digitizing for Hats and Caps
Hats are among the most challenging products to digitize because the embroidery surface is curved and often smaller than the available area on a shirt or jacket.
Common examples include:
- Baseball caps
- Snapbacks
- Trucker hats
- Structured caps
- Unstructured caps
- Sports hats
- Promotional caps
- Workwear caps
- Beanies
Why Hat Digitizing Is Different
The primary challenge is curvature.
When a flat embroidery design is stitched onto a curved cap, the center and outer edges of the design can behave differently.
The digitizer must consider:
- Cap curvature
- Center seam
- Available embroidery area
- Cap frame
- Needle penetration
- Stitch direction
- Design width
- Registration
- Fabric structure
A design that looks perfect on a computer screen may not stitch correctly on a curved cap without appropriate adjustments.
If you are specifically preparing artwork for headwear, see our guide on how to digitize a logo for a baseball cap.
Best Design Characteristics for Hat Embroidery
Caps generally work best with logos that have:
- Bold lettering
- Strong shapes
- Limited fine details
- Clear outlines
- Good spacing
- Moderate design dimensions
Small lettering and thin lines can become difficult to reproduce cleanly.
This is especially important when creating logos for sports teams, company branding, promotional caps, and streetwear.
Satin Stitch for Hat Logos
Satin stitches are frequently used for bold cap lettering and logo elements.
They can provide:
- Strong coverage
- Clean edges
- A professional finish
- High visual contrast
- Good readability
However, satin columns must be appropriately digitized for the width of the design.
3D Puff Embroidery on Hats
Caps are also one of the most popular applications for 3D puff embroidery.
Puff embroidery uses foam underneath selected stitches to create a raised, dimensional appearance.
It works particularly well for:
- Large initials
- Athletic lettering
- Bold brand names
- Monograms
- Simple symbols
For more information, read our guide to 3D puff hat digitizing on hats and beanies.
You can also explore our puff embroidery designs resource.
Digitizing for T-Shirts
T-shirts provide a different embroidery environment from caps.
Unlike structured hats, T-shirts are generally soft and flexible. Some fabrics also stretch significantly.
Common T-shirt materials include:
- Cotton
- Polyester
- Cotton-polyester blends
- Performance fabrics
- Jersey
- Lightweight knits
- Heavyweight cotton
Why T-Shirt Digitizing Is Different
The biggest challenge is controlling fabric movement.
If the fabric shifts during embroidery, the design can experience:
- Puckering
- Distortion
- Poor registration
- Uneven lettering
- Gaps
- Excessive tension
- Fabric stretching
The digitizer therefore needs to balance stitch density, underlay, pull compensation, and design size.
Best T-Shirt Embroidery Designs
T-shirts can support a wide range of embroidery styles, but designs should still be optimized for the fabric.
Suitable designs can include:
- Company logos
- Names
- Monograms
- Small chest logos
- Sports branding
- Promotional artwork
- Simple illustrations
Very large, dense embroidery designs can make lightweight T-shirts uncomfortable and may increase the risk of puckering.
Stabilization for T-Shirt Embroidery
Stabilization is especially important when embroidering stretchy fabrics.
The exact backing depends on:
- Fabric type
- Fabric weight
- Design size
- Stitch density
- Garment construction
- Machine setup
A professional digitizer should consider the stabilizer and fabric together rather than treating stabilization as an afterthought.
If you’re comparing embroidery with other T-shirt decoration methods, see our DTF vs. screen printing vs. embroidery guide.
Digitizing for Jackets
Jackets can present some of the most complicated embroidery conditions because they may contain thick fabrics, multiple layers, lining, insulation, seams, zippers, pockets, and other construction elements.
Common jacket materials include:
- Denim
- Nylon
- Canvas
- Fleece
- Polyester
- Leather-like materials
- Heavy cotton
- Softshell fabrics
Why Jacket Digitizing Is Different
A jacket may have significantly more thickness than a T-shirt.
The digitizer must consider:
- Fabric thickness
- Inner lining
- Seams
- Pockets
- Zippers
- Design placement
- Stabilization
- Needle penetration
- Thread buildup
The physical construction of the garment can influence where and how the design should be embroidered.
For example, a large design placed too close to a zipper or heavy seam may create production difficulties.
Best Designs for Jacket Embroidery
Jackets provide more visual space than many caps, making them suitable for:
- Large company logos
- Club emblems
- Motorcycle graphics
- Sports team designs
- Names and numbers
- Back designs
- Sleeve logos
- Chest logos
For decorative jacket projects, our complete guide to jackets with embroidered patches provides additional ideas.
Jacket Embroidery and Appliqué
For very large jacket designs, appliqué can sometimes reduce the amount of dense embroidery required.
Instead of covering a large area entirely with thread, fabric can form part of the design while embroidery provides outlines and details.
This can help create:
- Large lettering
- Athletic designs
- Team logos
- Decorative graphics
- Large back emblems
The appropriate technique depends on the artwork and garment.
Digitizing for Embroidered Patches
Patches are different from direct embroidery because the embroidery is created on a patch material rather than directly onto the final garment.
Patches can later be:
- Sewn onto garments
- Ironed onto fabric
- Attached with adhesive
- Applied to hats
- Added to jackets
- Used on bags
- Used for uniforms
Why Patch Digitizing Is Different
A patch needs a clearly defined outer shape and a durable edge.
Common patch elements include:
- Main artwork
- Background
- Border
- Edge stitching
- Lettering
- Backing
The border is especially important because it defines the patch and protects the edge.
Best Stitch Types for Patches
Patch designs frequently use:
Satin Stitch Borders
Satin stitches can create a strong, clean outer border.
Fill Stitches
Fill stitches can cover larger interior areas.
Running Stitches
Running stitches may be useful for fine details and outlines.
The ideal combination depends on the patch size and artwork.
For more information, read our guide on how to make embroidered patches with an embroidery machine.
You can also explore custom embroidered patches for additional patch applications.
The Same Logo Digitized for Four Different Products
Imagine a company has a circular logo containing a symbol and text.
The artwork could require four different approaches.
Version 1: Baseball Cap
The logo may need:
- Reduced width
- Simplified details
- Stronger satin columns
- Curvature adjustments
- Appropriate cap underlay
- Careful sequencing
Version 2: T-Shirt
The design may allow:
- More detail
- Larger dimensions
- Different underlay
- Fabric-specific density
- Adjusted pull compensation
Version 3: Jacket
The design may use:
- Larger dimensions
- Heavier stitch structure
- Different stabilization
- Appliqué
- Placement away from seams
Version 4: Patch
The design may require:
- Strong outer border
- Simplified interior details
- Patch-specific stitch sequencing
- Edge finishing
- Appropriate backing
The artwork remains the same, but the embroidery engineering changes.
How Fabric Type Affects Embroidery Digitizing
Fabric is one of the most important variables in embroidery.
Lightweight Fabric
Lightweight fabrics can be more susceptible to:
- Puckering
- Distortion
- Excessive tension
- Needle damage
Large, dense designs should be approached carefully.
Stretch Fabric
Stretch fabrics require special attention to stabilization and pull compensation.
Examples include:
- Performance shirts
- Athletic apparel
- Stretch polos
- Jersey fabrics
Heavy Fabric
Heavy fabrics such as denim and canvas can support larger designs but may require appropriate needle and machine settings.
Fleece
Fleece can have a textured surface that affects how stitches appear.
Additional consideration may be necessary to prevent the fabric from visually interfering with small embroidery details.
How Design Size Changes Digitizing Requirements
Design size directly influences stitch structure.
A small logo may require:
- Simplified details
- Shorter stitch lengths
- Reduced density
- Carefully selected fonts
A large design may require:
- More underlay
- Controlled density
- Larger stitch fields
- More complex sequencing
- Additional stabilization
The same artwork may therefore need different digitizing at different sizes.
How Stitch Density Changes by Garment
Stitch density should not be selected independently of the garment.
Too much density can cause:
- Thread buildup
- Puckering
- Fabric distortion
- Increased production time
- Excessive needle penetration
Too little density can cause:
- Poor coverage
- Visible fabric
- Weak borders
- Uneven appearance
Professional digitizing aims for the appropriate density for the artwork, fabric, garment, and desired visual result.
For more information, see our guide on how many stitches a logo should have.
Underlay: Why It Matters for Different Garments
Underlay provides a foundation for top stitches.
It can help:
- Stabilize fabric
- Control movement
- Improve coverage
- Support satin columns
- Reduce distortion
- Improve stitch definition
However, underlay should not simply be copied from one garment to another.
A lightweight T-shirt, structured cap, denim jacket, and patch material may each require a different approach.
Pull Compensation and Garment-Specific Digitizing
Pull compensation accounts for the way stitches can pull the fabric and alter the intended dimensions of a design.
Different fabrics react differently to embroidery tension.
For example:
- Stretch fabrics may move significantly.
- Structured caps resist movement but introduce curvature.
- Heavy jackets can require different compensation because of their thickness.
- Patch materials can behave differently from garments.
This is why experienced digitizers evaluate the physical embroidery surface rather than relying solely on the original artwork.
Stitch Direction for Hats, T-Shirts, Jackets, and Patches
Stitch direction affects both appearance and physical behavior.
Changing stitch direction can influence:
- Light reflection
- Texture
- Shape
- Stability
- Coverage
- Dimensional appearance
On curved caps, stitch direction may be planned with the cap’s geometry in mind.
On jackets and T-shirts, stitch direction can help control how fabric responds to dense areas.
On patches, direction can help create visual contrast between different design elements.
Embroidery File Formats for Different Garments
The final embroidery file format generally depends on the embroidery machine rather than the garment itself.
Common formats include:
- DST
- PES
- JEF
- VP3
- EXP
- XXX
- HUS
However, the stitch file itself may be created specifically for the garment and application.
For example, you might have:
- CompanyLogo-Cap.dst
- CompanyLogo-Shirt.dst
- CompanyLogo-Jacket.dst
- CompanyLogo-Patch.dst
They could technically be the same machine format, but their stitch structures may be different.
Learn more with our guide to supported embroidery file formats.
Why Vector Artwork Helps With Garment-Specific Digitizing
Clean vector artwork can make it easier to evaluate shapes, boundaries, lettering, and design proportions before digitizing.
Common vector formats include:
- SVG
- AI
- EPS
However, a vector file is not automatically an embroidery file.
Vector artwork defines shapes, while embroidery digitizing converts those shapes into stitch instructions.
Our vector conversion and embroidery digitizing guide explains this distinction in more detail.
If your source artwork is a raster image, see our JPG/PNG to vector conversion guide.
Common Digitizing Mistakes Across Different Garments
Using One File for Every Product
This is one of the most common mistakes.
Better approach: Create garment-specific versions where necessary.
Ignoring Fabric Characteristics
The same density may not work equally well on cotton, polyester, denim, fleece, and structured cap fabric.
Better approach: Digitize according to the actual material.
Making Small Text Too Detailed
Tiny text can lose clarity after stitching.
Better approach: Simplify fonts and increase dimensions when possible.
Excessive Stitch Density
Dense embroidery can cause puckering and thread buildup.
Better approach: Optimize density based on fabric and design.
Poor Stabilization
Even excellent digitizing can fail if the garment moves.
Better approach: Match stabilization to the fabric and embroidery application.
Ignoring Curvature on Caps
Flat artwork does not automatically translate perfectly to curved headwear.
Better approach: Use cap-specific digitizing and appropriate hooping.
Placing Designs Over Seams
On jackets and other garments, seams can interfere with embroidery.
Better approach: Plan placement before digitizing.
Skipping Test Sew-Outs
A digital preview cannot always predict how the design will behave physically.
Better approach: Test the actual garment or material before production.
For more common problems, read 5 embroidery digitizing mistakes to avoid.
How Professionals Adapt One Logo for Multiple Garments
A professional garment digitizing workflow generally follows these steps:
Step 1: Analyze the Artwork
Identify lettering, outlines, fills, small details, and design complexity.
Step 2: Identify the Product
Determine whether the logo will be stitched on:
- Hat
- T-shirt
- Jacket
- Patch
- Polo
- Bag
- Other apparel
Step 3: Evaluate the Material
Determine the fabric weight, stretch, texture, and construction.
Step 4: Determine Design Size
Establish the final embroidery dimensions.
Step 5: Select Stitch Types
Choose satin, fill, running stitches, appliqué, or combinations.
Step 6: Build the Underlay
Create an appropriate foundation for the garment.
Step 7: Adjust Density
Optimize coverage without creating unnecessary stitch buildup.
Step 8: Add Pull Compensation
Account for the physical behavior of the material.
Step 9: Sequence the Design
Organize elements to improve registration and production efficiency.
Step 10: Simulate the Embroidery
Review the stitch sequence digitally.
Step 11: Test Stitch
Sew the design on the actual product or a representative material.
Step 12: Refine
Make adjustments based on the physical result.
Step 13: Export the Correct File
Provide the format required by the embroidery machine.
This workflow produces more predictable results than simply resizing and exporting one universal embroidery file.
Which Garment Is Easiest to Digitize?
There is no universal answer because difficulty depends on the artwork and production setup.
However, each application presents different challenges.
Hats
Main challenge: Curvature and limited embroidery space.
T-Shirts
Main challenge: Stretch, movement, and puckering.
Jackets
Main challenge: Thickness, seams, lining, and construction.
Patches
Main challenge: Edge definition, borders, backing, and finishing.
The easiest product for a particular design depends on the combination of artwork, material, size, and machine.
Best Digitizing Approach by Garment
| Garment/Product | Digitizing Priority | Recommended Design Approach |
|---|---|---|
| Hat | Curvature and registration | Bold, compact designs |
| T-shirt | Stability and fabric control | Moderate-density designs |
| Jacket | Thickness and placement | Medium/large designs |
| Patch | Border and edge strength | Clearly defined shapes |
| Polo | Lightweight fabric control | Small-to-medium logos |
| Fleece | Surface coverage | Strong, readable shapes |
| Denim | Needle penetration and density | Bold, durable designs |
When Should You Create Separate Embroidery Files?
You should strongly consider separate files when:
- The garment changes significantly
- The fabric changes
- The design size changes substantially
- A cap version is required
- A 3D puff version is required
- The patch version needs a border
- Stitch density needs adjustment
- The design moves to a different placement
- The embroidery machine requires a different setup
For example, a chest logo for a T-shirt may not need the same stitch structure as a large back logo on a jacket.
Likewise, a cap logo may require a completely different construction because of curvature.
How Much Does Garment-Specific Digitizing Cost?
Embroidery digitizing pricing can depend on:
- Artwork complexity
- Design dimensions
- Stitch count
- Number of colors
- Number of garment-specific versions
- Puff or specialty embroidery requirements
- Required file formats
- Turnaround time
- Editing and revisions
If you need multiple versions of one logo, the project may cost more than creating a single standard file because each version requires additional digitizing and testing.
See our embroidery digitizing cost per 1,000 stitches guide and our complete embroidery digitizing cost guide for more information.
How to Choose a Professional Embroidery Digitizing Service
When selecting a digitizing provider, do not judge quality only by price.
Look for:
- Garment-specific digitizing
- Experienced digitizers
- Manual stitch editing
- Test sew-outs
- Multiple machine formats
- Clear communication
- Revision support
- Quality control
- Experience with caps
- Experience with jackets
- Experience with patches
- Experience with different fabrics
A provider should understand that a logo is not simply a collection of shapes. It must be engineered to behave correctly when converted into stitches.
Our guide on why professional logo digitizing quality can save money explains why inexpensive digitizing can sometimes create higher productiocosts.
Garment-Specific Embroidery Digitizing Checklist
Before production, confirm the following:
- Correct garment identified
- Fabric type evaluated
- Design dimensions confirmed
- Artwork cleaned and simplified where necessary
- Stitch types selected appropriately
- Underlay optimized
- Stitch density checked
- Pull compensation considered
- Stitch direction planned
- Seams and construction considered
- Stabilizer selected
- Hoop or frame confirmed
- Machine file format confirmed
- Test sew-out completed
- Final embroidery inspected
Frequently Asked Questions About Digitizing for Different Garments
Does embroidery digitizing change depending on the garment?
Yes. The same logo may require different stitch structures, density, underlay, compensation, sequencing, or dimensions depending on whether it is embroidered on a hat, T-shirt, jacket, or patch.
Can I use the same DST file for a hat and T-shirt?
You technically may be able to load the same file if the machine supports DST, but that does not mean the file is optimized for both products. A cap and T-shirt have very different physical characteristics, so garment-specific adjustments are often preferable.
Is hat digitizing harder than T-shirt digitizing?
Hat digitizing can be more challenging because caps have curved surfaces, limited embroidery areas, and specialized hooping requirements. However, the difficulty ultimately depends on the artwork and production setup.
Why does my embroidery look good on a T-shirt but bad on a cap?
A cap’s curved surface can cause distortion or registration problems when a design is not specifically optimized for headwear. The same file may therefore require cap-specific digitizing.
Should jacket embroidery use more stitches?
Not necessarily. A heavier jacket does not automatically require maximum stitch density. The correct stitch count depends on the artwork, size, fabric, design structure, and desired coverage.
Do embroidered patches need different digitizing?
Yes. Patches generally require specialized borders, edge stitching, backing considerations, and finishing requirements that differ from direct garment embroidery.
Can one logo have multiple embroidery files?
Absolutely. Professional embroidery providers commonly create different versions of the same logo for different garments, sizes, placements, or embroidery techniques.
What is the best embroidery digitizing software?
There are many professional and beginner-friendly digitizing applications. The software itself is only part of the process; the digitizer’s understanding of stitch construction, fabric behavior, and machine embroidery is equally important.
Is vector artwork required for embroidery digitizing?
Not always. A digitizer can often work from JPG, PNG, PDF, or other artwork, depending on quality. However, clean vector artwork can make artwork preparation and shape interpretation easier.
How can I get the best embroidery results?
Use clean artwork, select the correct garment-specific digitizing approach, choose suitable stabilization, test the design on the actual material, and work with an experienced embroidery digitizer.
Final Takeaway: Digitizing Must Match the Garment
The biggest lesson in professional embroidery is simple:
The artwork may stay the same, but the digitizing strategy should change according to the garment.
Hats require special attention to curvature, limited space, hooping, and registration.
T-shirts require careful control of stretch, stabilization, density, and puckering.
Jackets require consideration of thickness, seams, layers, lining, and placement.
Patches require strong borders, clean edges, suitable backing, and a stitch structure designed specifically for the patch material.
Understanding these differences can dramatically improve embroidery quality and reduce production problems.
If you are preparing a logo for multiple products, do not simply resize one embroidery file and assume it will perform equally well everywhere. Instead, evaluate the garment, fabric, size, placement, stitch structure, and production requirements before creating the final file.
For businesses that need consistent results across caps, T-shirts, jackets, patches, and other apparel, professional garment-specific digitizing is often the most reliable approach.
Explore more resources from Rise Digitizing, including our professional embroidery digitizing services, custom embroidery digitizing, and professional logo digitizing service.
Related Embroidery Guides
- How to Digitize a Logo for a Baseball Cap
- Complete Guide to Embroidery Digitizing
- 5 Embroidery Digitizing Mistakes to Avoid
- How to Digitize a Logo for Embroidery
- Custom Embroidery Patches
- 3D Puff Hat Digitizing on Hats and Beanies
- Embroidery File Formats Supported
- Embroidery Digitizing Cost Per 1,000 Stitches
Related Posts