
Embroidery is a popular way to personalize shirts, jackets, polos, uniforms, hats, and other garments. It can add a professional appearance and make clothing more distinctive. However, there are times when you may want to remove embroidery from a shirt.
Perhaps you purchased a second-hand shirt with a company logo, changed your business branding, received a garment with an outdated design, or simply want to reuse a shirt without its existing embroidery. Whatever the reason, you may be wondering: Can embroidery be removed from a shirt without damaging the fabric?
The short answer is yes, embroidery can usually be removed from a shirt, but the process requires patience and the right tools. The difficulty depends on the type of embroidery, the fabric, the number of stitches, the thread used, and how long the embroidery has been on the garment.
In this guide, we explain how embroidery removal works, what tools you need, how to remove embroidery safely, what problems you may encounter, and how to repair the fabric afterward.
Can Embroidery Be Removed From a Shirt?
Yes, most machine or hand embroidery can be removed from a shirt. Embroidery consists primarily of threads stitched through the fabric, so carefully cutting and pulling those threads can separate the design from the garment.
However, removing embroidery does not always make the shirt look exactly as it did before the design was added.
When embroidery has been attached to a garment for a long time, the fabric may show:
- Small needle holes
- Stitch marks
- Thread impressions
- Discoloration
- Fabric stretching
- A visible outline of the original design
- Damage to the fabric underneath the embroidery
For this reason, embroidery removal should be performed carefully, particularly on lightweight or delicate fabrics.
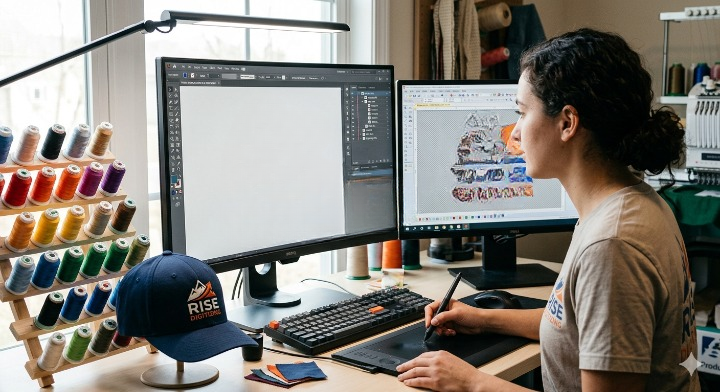
If you are interested in how embroidery is created in the first place, you can learn more through this complete guide to embroidery digitizing.
Why Would You Want to Remove Embroidery From a Shirt?
There are several common reasons someone might want to remove embroidery.
1. Removing an Old Company Logo
Businesses frequently update their branding. If employees have uniforms with an old logo, removing the embroidery may allow the garments to be reused.
2. Reusing Second-Hand Clothing
Second-hand shirts, jackets, and uniforms sometimes contain embroidered names, logos, or designs. Removing the embroidery can make the garment more suitable for personal use.
3. Correcting an Embroidery Mistake
An embroidered design may contain the wrong name, incorrect spelling, outdated information, or an unwanted color. In some situations, removing the design is preferable to replacing the entire garment.
4. Changing a Personalized Design
A shirt with a person’s name or previous owner’s details may need to be updated. Removing the old embroidery can make room for a new design.
5. Reusing a Garment for a New Design
Some businesses reuse shirts, polos, jackets, and uniforms by removing an old logo and adding a new one.
What Tools Do You Need to Remove Embroidery?
You do not necessarily need expensive equipment to remove embroidery. The basic process can be performed with a few simple tools.
Common embroidery-removal tools include:
- Seam ripper
- Small embroidery scissors
- Tweezers
- Magnifying glass
- Lint roller
- Soft brush
- Iron
- Clean cloth
A seam ripper is usually one of the most useful tools because its sharp point can get underneath individual stitches without cutting large sections of the fabric.
Small embroidery scissors can also help when dealing with dense stitching.
Avoid using large household scissors because they can easily cut the shirt fabric along with the embroidery thread.
How to Remove Embroidery From a Shirt
The safest approach is to work slowly rather than trying to pull the entire design off at once.
Step 1: Turn the Shirt Inside Out
Start by turning the shirt inside out.
The back of the embroidery often provides easier access to the bobbin thread and backing material. Working from the reverse side can make it easier to cut the stitches without accidentally damaging the front of the shirt.
Place the garment on a clean, flat surface.
Step 2: Identify the Embroidery Backing
Many machine-embroidered garments have a backing material underneath the stitches.
The backing may be:
- Tear-away backing
- Cut-away backing
- Water-soluble backing
- Adhesive backing
Do not immediately pull the backing away. First determine how it is attached and whether removing it could stretch the fabric.
Step 3: Cut the Stitches Carefully
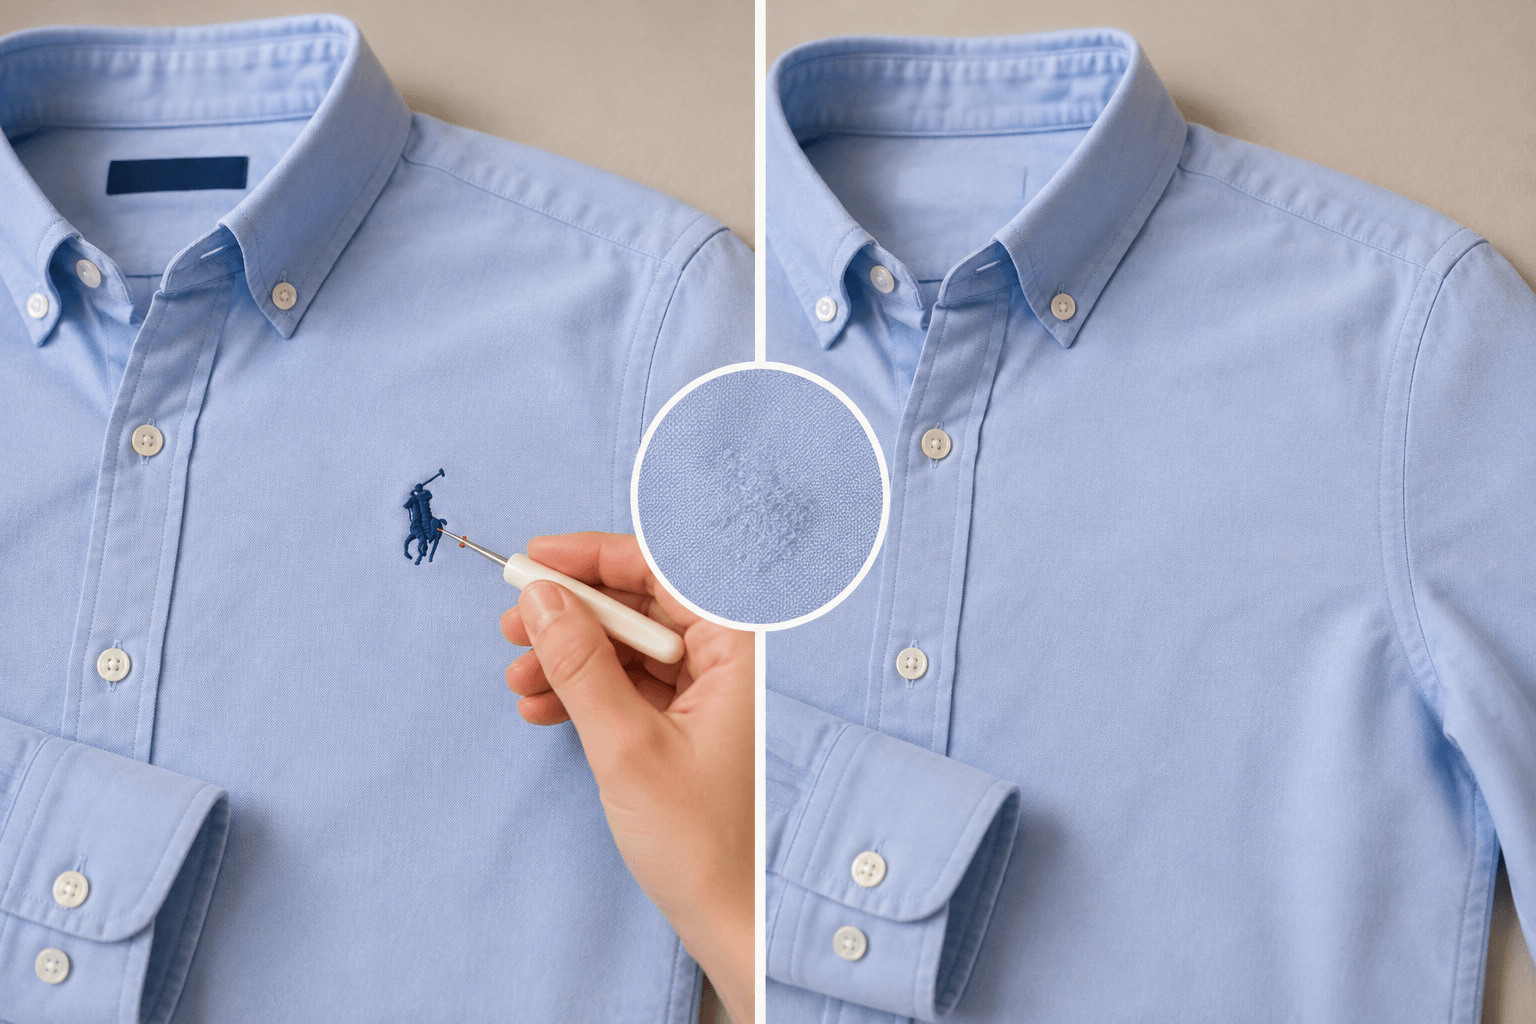
Use a seam ripper or small embroidery scissors to cut the threads.
Work on a small section at a time.
Insert the seam ripper underneath a group of stitches and gently cut them. Avoid forcing the tool into the fabric.
For dense embroidery, it may be necessary to work through several small sections rather than attempting to remove the complete design in one step.
Step 4: Pull Out the Loose Threads
After cutting several stitches, turn the shirt back to the front.
Use tweezers to gently pull out the loose threads.
Do not pull aggressively. If a thread does not move easily, return to the reverse side and cut more stitches.
Trying to force a tightly attached thread can stretch the fabric or create additional holes.
Step 5: Continue Working Around the Design
Repeat the process until most of the embroidery has been removed.
For large designs, divide the artwork into smaller sections.
For example, if a logo contains several letters and decorative elements, remove each area individually instead of trying to remove the entire logo at once.
This gives you better control and reduces the risk of fabric damage.
Step 6: Remove Remaining Thread
Once the main embroidery has been removed, inspect the shirt carefully.
Small pieces of thread may remain in the fabric.
Use tweezers, a lint roller, or a soft brush to remove loose fibers.
Do not scrape the fabric aggressively because this can cause pilling or surface damage.
Step 7: Remove the Backing
If the embroidery has a backing material, remove it carefully after the stitches have been cut.
Some backing can be peeled away by hand, while other types may need to be trimmed.
If the backing is strongly attached, do not pull it forcefully. Excessive pulling can distort the garment.
Step 8: Clean and Inspect the Shirt
After removing the embroidery, inspect the area under good lighting.
Look for:
- Remaining threads
- Needle holes
- Fabric distortion
- Adhesive residue
- Thread shadows
- Discoloration
A gentle wash may help the fabric relax and reduce the appearance of some stitch marks.
How Do You Remove Embroidery Without Damaging the Shirt?
The biggest challenge is removing the embroidery without cutting or stretching the garment.
There are several precautions you can take.
Work From the Back
Whenever possible, access the embroidery from the inside of the garment. This makes it easier to identify individual stitches.
Use a Sharp Seam Ripper
A dull tool can require more force and increase the chance of damaging the fabric.
A sharp seam ripper allows you to cut stitches with controlled movements.
Never Rush
Dense embroidery may contain thousands of stitches. Trying to remove everything quickly can result in accidental cuts.
Take your time and work in small sections.
Avoid Pulling Tight Threads
If a thread is still attached, do not yank it. Cut the remaining connection first.
Test on an Inconspicuous Area
If you are using any cleaning product or adhesive-removal method, test it on a hidden part of the garment first.
Can You Remove Machine Embroidery From a Shirt?
Yes. Machine embroidery can usually be removed, but it can be more difficult than removing simple hand embroidery.
Machine embroidery can contain a large number of tightly packed stitches. Designs may also include multiple stitch types, underlay stitching, and backing materials.
Dense embroidery is particularly challenging because the needle penetrates the fabric many times.
If you are interested in how machine embroidery files are created, see this guide on what digitizing for embroidery means.
Can You Remove Hand Embroidery From a Shirt?
Hand embroidery can also be removed.
In many cases, hand embroidery may be easier to remove because you can identify individual stitches more clearly. However, the difficulty depends on the stitch type and how tightly the design was sewn.
Simple running stitches may be relatively easy to remove, while dense satin stitches or decorative stitching can require considerably more time.
If you are learning embroidery techniques, you may also find this resource about simple embroidery techniques useful.
What Happens to the Shirt After Embroidery Is Removed?
Removing the thread does not necessarily restore the shirt to its original condition.
You may notice small holes where the embroidery needle entered the fabric.
The visibility of these holes depends on the fabric.
Cotton
Cotton shirts may recover reasonably well after washing, particularly when the embroidery was not extremely dense.
Polyester
Polyester garments can also show needle marks, although the final appearance depends on the material and embroidery density.
Knit Fabrics
Stretchy knit fabrics can be more difficult because repeated stitching may permanently affect the structure of the fabric.
Delicate Fabrics
Silk and other delicate materials should be handled particularly carefully. Professional assistance may be preferable when the garment is expensive or difficult to replace.
Can Washing Remove Embroidery Marks?
Washing does not remove embroidery itself. However, after the threads have been removed, washing can sometimes help the fabric relax.
Use the garment’s recommended washing instructions.
Avoid harsh washing methods immediately after embroidery removal, especially if the fabric is delicate or has already been stretched.
A gentle wash followed by air drying can be a safer option.
How Do You Remove Embroidery Backing?
The method depends on the backing.
Tear-Away Backing
Tear-away backing is designed to separate from the embroidery after stitching. Remove it gently once the embroidery stitches have been cut.
Cut-Away Backing
Cut-away backing is intended to remain underneath the embroidery. If the embroidery is being completely removed, carefully trim away the remaining backing without cutting the shirt.
Water-Soluble Backing
Some embroidery uses water-soluble materials that dissolve when exposed to water.
However, not every backing material is water-soluble, so identify the backing before applying water.
Can You Remove Embroidery With a Razor?
A razor can potentially cut embroidery thread, but it is generally not the safest option for removing embroidery from clothing.
A razor can easily cut the actual garment if it slips underneath the thread.
A seam ripper provides more control and is specifically designed for separating stitches.
If you regularly work with embroidery, having proper tools can make the removal process much safer.
Can Embroidery Removal Leave Holes?
Yes.
Every embroidery stitch creates a needle penetration point in the fabric. When thousands of stitches are used, removing the thread can leave small visible holes or marks.
The final appearance depends on:
- Fabric type
- Fabric thickness
- Stitch density
- Number of stitches
- Age of the embroidery
- Size of the design
- How carefully the stitches are removed
Lightweight fabrics are generally more likely to show signs of previous embroidery.
Can You Cover the Area Instead of Removing the Embroidery?
Sometimes covering an unwanted embroidered design is easier than removing it.
For example, you could replace an old logo with:
- A new embroidered logo
- An embroidered patch
- A larger design
- A printed design
- An applique
- A decorative patch
This approach may be especially useful when removing the existing embroidery would leave noticeable marks.
For ideas, explore these guides on custom embroidered patches and custom embroidered patches on clothes.
Can You Replace Old Embroidery With a New Logo?
Yes. In some cases, a garment can be updated with a new logo after the previous design has been removed.
However, the new design should be large enough to cover any visible marks left behind by the previous embroidery.
Before ordering the new design, consider:
- Logo dimensions
- Fabric type
- Stitch density
- Thread colors
- Placement
- Existing needle marks
- Backing requirements
If you need to prepare artwork for embroidery, you can learn more about how to digitize a logo for embroidery.
Is It Better to Remove Embroidery or Cover It?
The right choice depends on the garment and the condition of the fabric.
Remove the embroidery when:
- The design is small
- The fabric is durable
- You want a completely different appearance
- The previous embroidery is relatively simple
Cover the embroidery when:
- The design is very dense
- Removing it may damage the garment
- The fabric already shows needle marks
- You can use a larger replacement design
- You want to save time
For valuable garments, compare both options before making a decision.
When Should You Use Professional Embroidery Removal?
DIY removal is possible for many shirts, but professional help may be better in certain situations.
Consider professional assistance when:
- The garment is expensive
- The fabric is delicate
- The embroidery is extremely dense
- The design covers a large area
- The garment has sentimental value
- You need the area to look as clean as possible
- You plan to replace the logo professionally
A professional can assess the fabric and determine whether removal, replacement, or covering the embroidery is the best option.
If you need new embroidery after removing an old design, professional custom embroidery services can help create a replacement design.
How Long Does It Take to Remove Embroidery?
There is no single removal time because every design is different.
A small embroidered name may take only a few minutes, while a large, dense logo can take considerably longer.
The main factors include:
- Size of the embroidery
- Stitch count
- Stitch density
- Number of colors
- Type of fabric
- Backing material
- Accessibility of the design
Dense professional embroidery can require significant patience because each stitch may need to be cut individually.
What If the Embroidery Is Too Difficult to Remove?
If you have started removing embroidery and notice that the fabric is becoming damaged, stop the process.
Continuing can turn a minor issue into a permanent tear.
Instead, consider covering the design with a patch or replacing it with a new embroidered design.
If you want to understand how embroidered patches are made, check out this guide on how to make embroidered patches.
Can You Remove Embroidery From a Polo Shirt?
Yes, embroidery can generally be removed from polo shirts.
However, polo shirts are often made from knitted fabrics that can stretch. Extra care should therefore be taken when removing embroidery from the chest, sleeve, or collar.
Avoid pulling threads aggressively, and support the fabric while cutting stitches.
If the polo contains a business logo, replacing the old logo with an updated design may sometimes produce a better result than completely removing it.
Can You Remove Embroidery From a Jacket?
Embroidery can also be removed from jackets.
Jackets may have thicker fabric, lining, stabilizers, and larger embroidered designs. These additional layers can make removal more complicated.
If a jacket contains a large embroidered logo, name, or patch, inspect both sides before beginning.
If the design is attached as a separate patch rather than stitched directly into the jacket, the removal method may be different.
For jacket styling ideas, see this complete guide to jackets with embroidered patches.
How to Prevent Damage During Embroidery Removal
The best way to protect your shirt is to work slowly and avoid unnecessary force.
Keep these tips in mind:
- Turn the garment inside out.
- Identify the embroidery backing.
- Use a sharp seam ripper.
- Cut small groups of stitches.
- Remove loose threads with tweezers.
- Avoid pulling tightly attached threads.
- Support the fabric while working.
- Inspect the garment frequently.
- Stop if the fabric begins to tear.
- Wash the garment gently after removal if appropriate.
Frequently Asked Questions
Can embroidery be completely removed from a shirt?
Embroidery can usually be removed, but the garment may still show needle holes, stitch marks, discoloration, or fabric impressions afterward.
What is the easiest way to remove embroidery?
A seam ripper and tweezers are among the most practical tools. Working from the back of the embroidery and removing stitches gradually provides better control.
Will removing embroidery damage the shirt?
It can. The risk depends on the fabric, stitch density, design size, and removal technique. Working carefully reduces the possibility of damage.
Can I remove an embroidered logo myself?
Yes, a small or simple logo can often be removed at home. Large, dense, or delicate embroidery may be better handled professionally.
Can embroidery be removed without leaving holes?
Not always. Embroidery creates needle holes in the fabric, and some holes or stitch marks may remain after the threads are removed.
Should I remove or cover an unwanted logo?
If removing the logo could damage the fabric or leave noticeable marks, covering it with a new design or embroidered patch may be a better option.
Can I put new embroidery where old embroidery was removed?
Yes, but the new design should be planned around any remaining marks or needle holes. A larger design can sometimes hide the area more effectively.
Is a seam ripper safe for removing embroidery?
A seam ripper is one of the preferred tools for carefully cutting stitches, but it still needs to be used cautiously to avoid cutting the garment.
Final Thoughts
So, can embroidery be removed from a shirt? Yes, in most cases it can.
The key is to remember that removing the thread does not necessarily restore the fabric completely. Small needle holes, stitch marks, discoloration, or fabric distortion may remain, particularly when the original embroidery was large or densely stitched.
For simple embroidery, you can often perform the removal yourself using a seam ripper, small scissors, and tweezers. Work from the back of the garment, cut the stitches carefully, and avoid pulling threads aggressively.
For expensive, delicate, heavily embroidered, or sentimental garments, professional assistance may be the safer choice.
And if removing the embroidery would leave an obvious mark, consider replacing or covering the original design with a new embroidered logo or custom patch instead.
If you are creating a new embroidered design after removing an old one, proper artwork preparation and digitizing can make a significant difference in the final result. You can explore professional embroidery digitizing services when you need artwork converted into an embroidery-ready file.