
When you have a beautiful logo or design concept, you want to see it come to life on apparel and promotional items. But did you know there’s a critical step between your design and the finished embroidered product? That step is embroidery digitizing.
Embroidery digitizing is the art and science of converting artwork into machine-readable stitch files. It’s what allows state-of-the-art embroidery machines to recreate your designs with precision and perfection. Whether you’re a small business owner wanting custom-branded polo shirts or a large corporation creating promotional materials, understanding embroidery digitizing can save you time, money, and headaches.
In this comprehensive guide, we’ll walk you through everything you need to know about digitizing services, the technologies involved, and how to choose the right partner for your project.
What is Embroidery Digitizing?
The Basics
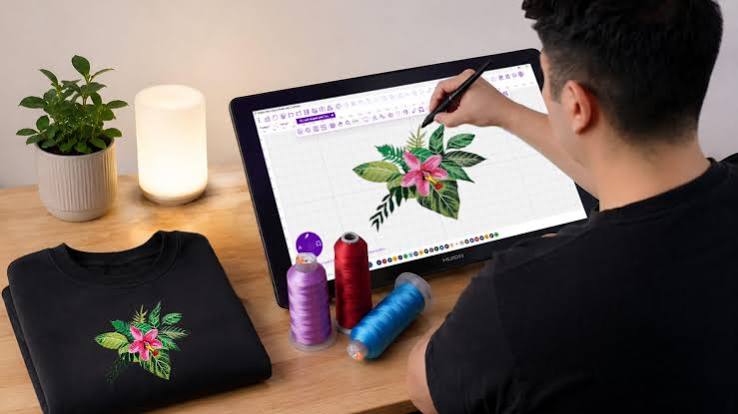
Embroidery digitizing is the process of converting digital artwork (logos, images, artwork) into a format that embroidery machines can read and stitch. Professional digitizers use specialized software to map out each stitch, determining the stitch type, direction, and sequence.
Think of it like this: your embroidery machine doesn’t “understand” your logo the way you do. Instead, it needs precise instructions in the form of stitch data. A digitizer creates these instructions by placing individual stitches that collectively recreate your original design.
Why Professional Digitizing Matters
You might wonder: “Can’t I just load my PNG file into an embroidery machine?” The short answer is no. Simply placing an image file into an embroidery machine typically results in poor-quality stitching, puckering fabric, thread breaks, and wasted materials.
Professional digitizing ensures:
- Stitch Optimization: Expert digitizers understand how to minimize stitches without compromising quality
- Fabric Compatibility: Different fabrics require different stitch approaches
- Color Separation: Properly sequenced colors prevent bleeding and maintain design integrity
- Production Efficiency: Well-digitized files reduce machine time and material waste
- Professional Results: Your design looks exactly as intended when embroidered
Understanding the Embroidery Digitizing Process
Step 1: Initial Consultation & Design Assessment
The first stage in any professional digitizing project involves discussing your specific needs:
- What is the design concept?
- Where will it be embroidered (hat, polo shirt, jacket)?
- What size should the final design be?
- Are there specific color requirements?
- What is your budget?
At this stage, working with professional embroidery digitizing services means you have access to experienced consultants who can advise on feasibility and provide recommendations.
Step 2: File Preparation & Conversion
If you’re starting with a raster image (like a JPEG or PNG), digitizers need to convert it to a vector format. This is where vector art services come into play. Vector art conversion creates clean, scalable artwork that can be digitized without loss of quality.
Step 3: Digitization
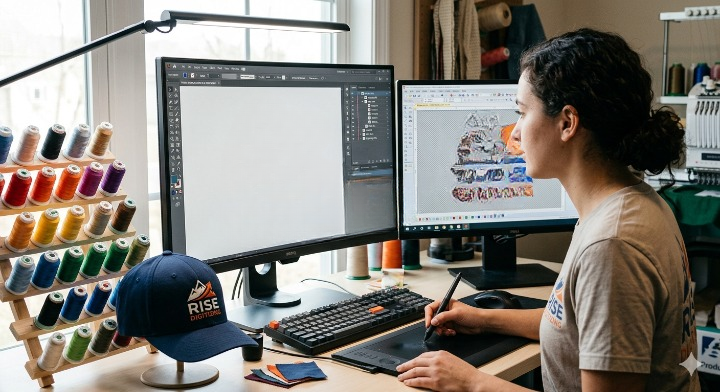
This is where the magic happens. Using specialized software like Wilcom, Digitech, or Tajima, the digitizer:
- Traces the outline of your design
- Determines optimal stitch types (running stitch, satin stitch, fill stitch)
- Plans stitch direction and density
- Sequences color changes
- Calculates the most efficient stitch path
- Tests for potential issues (puckering, thread breaks, floating elements)
Step 4: Quality Control & Testing
Professional digitizing shops don’t just hand over files. They test digitized designs on actual embroidery machines to ensure:
- Stitches follow the design accurately
- Colors appear as intended
- Fabric doesn’t pucker
- No thread breaks or tangles occur
- File size is optimized for production
Step 5: File Delivery & Support
Quality digitizing services provide files in multiple formats compatible with various machines (DST, EMB, PES, etc.) and offer unlimited revisions until you’re completely satisfied.
Types of Embroidery Digitizing
Logo Digitizing
Your company logo is your brand identity. Professional logo digitizing ensures your brand looks consistent and professional across all embroidered items—whether it’s a single polo shirt or 500 corporate uniforms.
Key considerations for logo digitizing:
- Scalability across different sizes
- Maintaining brand colors
- Working with complex elements
- Production efficiency
3D Puff Embroidery
3D puff embroidery creates a raised, dimensional effect that really stands out. Using specialized foam thread, digitizers create designs that literally pop off the garment.
Common applications include:
- Baseball caps and beanies
- Branded apparel
- Promotional items
- Premium merchandise
The art of 3D puff digitizing involves:
- Calculating proper foam density
- Layering techniques for dimension
- Managing stitch tension
- Creating balanced visual weight
Appliqué Digitizing
Appliqué combines embroidery with fabric pieces for striking visual effects. Rather than embroidering an entire design, digitizers create guide stitches to outline fabric pieces that are sewn down, then add embroidery details around them.
This technique is ideal for:
- Large area designs (appliqué covers more space efficiently)
- Multi-colored designs
- Textured effects
- Complex artwork
Appliqué digitizing requires precise planning to ensure fabric pieces align perfectly with guide stitches.
Photorealistic Embroidery
Modern digitizing can create photorealistic embroidered images using advanced techniques and thread color knowledge. Professional digitizers use:
- Gradient stitching techniques
- Specialized thread colors (sometimes 50+ colors)
- Long stitch lengths where appropriate
- Strategic underlay placement
- Advanced stitch blending
File Formats & Compatibility
Different embroidery machines require different file formats. Professional digitizers provide files in multiple formats:
Common Embroidery File Formats:
| Format | Machine Type | Notes |
|---|---|---|
| DST | Tajima | Industry standard, widely compatible |
| PES | Brother | Most common for home embroiderers |
| EMB | Melco | Professional machines |
| EXP | Melco | Wilcom software standard |
| JEF | Janome | Common format |
| HUS | Husqvarna | Viking and Husqvarna machines |
| ART | Bernina | Bernina embroidery machines |
| VIP | Husqvarna | Embroidery Plus format |
| CND | Melco | Compressed file format |
Professional services like ours provide files in all these formats, ensuring compatibility with your specific equipment.
How Digitizing Affects Embroidery Quality
Underlay Techniques
Underlay stitching is invisible in the final product but crucial for quality. It:
- Stabilizes fabric before actual stitches are applied
- Prevents puckering and shifting
- Creates a foundation for other stitches
- Must be minimized to avoid bulk
Expert digitizers use different underlay strategies based on:
- Fabric type (knit vs. woven)
- Design complexity
- Intended use
- Performance requirements
Stitch Direction
The direction of stitches affects appearance and durability:
- Stitches parallel to fabric tension points can break
- Stitches at angles distribute stress better
- Satin stitch direction affects how light reflects
- Fill stitch direction can create visual movement
Master digitizers understand these principles intuitively.
Thread Density
Too dense, and your thread becomes bulky and risks breaking. Too sparse, and the design looks unfinished:
- Satin stitches typically use 4-5 density
- Fill stitches vary by thread type
- Underlay uses lighter density (1-2)
- Context matters (hat embroidery vs. shirt embroidery)
Color Sequencing
The order of color changes impacts both appearance and production efficiency:
- Colors should generally progress from dark to light
- Sequence affects how colors blend visually
- Production time increases with color changes
- Some machines have color limits
The Difference Between DIY and Professional Digitizing
DIY Digitizing Risks:
While digitizing software is available to consumers, attempting DIY digitizing often results in:
- Poor stitch quality and misshapen designs
- Excessive stitching (bloated files, long machine time)
- Inefficient color sequencing
- Machine jams and thread breaks
- Wasted materials (garments, thread)
- Frustration and delays
The cost of failed attempts quickly exceeds professional services.
Professional Digitizing Advantages:
Working with professional digitizers provides:
- Expert stitch optimization (30-50% fewer stitches)
- Machine testing before production
- Multiple file format delivery
- Unlimited revisions
- Technical support
- Consistent results across large batches
- Time savings
- Peace of mind
Choosing the Right Embroidery Digitizing Service
Key Factors to Consider:
1. Experience & Portfolio Review the digitizer’s portfolio. Can they handle your design type? Do their finished samples look professional? Check for complexity levels that match your needs.
2. Turnaround Time Some projects are urgent. Does the service offer quick turnaround? Can they handle rush orders without sacrificing quality?
3. Quality Control Do they test on actual machines? Do they offer revision guarantees? What’s their process for ensuring accuracy?
4. Technical Support Will they answer questions after delivery? Do they provide technical guidance? Are they responsive?
5. Pricing While price matters, it shouldn’t be your only consideration. A bargain digitizer who delivers poor results costs more than quality digitizers in the long run.
6. File Delivery Options Do they provide files in the formats you need? Can they deliver via email, FTP, or cloud storage?
7. Additional Services Do they offer related services like vector art conversion or screen printing? One-stop shops can be convenient.
Common Digitizing Challenges & Solutions
Challenge 1: Complex Logos with Small Details
Problem: Logos with fine lines or tiny text don’t translate well to embroidery at small sizes.
Solution: Professional digitizers can:
- Simplify designs strategically while maintaining recognition
- Recommend minimum sizing
- Suggest alternative techniques (offset printing for details)
- Enlarge and re-digitize for larger applications
Challenge 2: Thin Lines & Hair-Thin Elements
Problem: Very thin lines break, look inconsistent, or disappear entirely.
Solution:
- Convert thin lines to satin stitches
- Increase thickness slightly
- Use specialized techniques for fine detail
- Recommend combination approaches
Challenge 3: Too Many Colors
Problem: Designs with 30+ colors become expensive to produce, slow to stitch, and prone to errors.
Solution:
- Consolidate similar colors
- Use thread blending techniques
- Consider splitting into multiple embroidery designs
- Explore combination methods (embroidery + printing)
Challenge 4: Scaling Issues
Problem: A logo digitized for 3″ doesn’t work well at 1″ or 6″.
Solution:
- Re-digitize for different sizes
- Adjust underlay and density for scale
- Simplify for smaller sizes
- Explain limitations and recommendations
Complementary Services: Beyond Basic Digitizing
Vector Art Services
If you’re starting with a low-quality image, professional vector art conversion creates clean, scalable artwork perfect for digitizing. This is essential if your logo only exists as a raster image.
Screen Printing Integration
Many designs work even better when combining embroidery with screen printing. For example:
- Embroider the logo on chest
- Screen print details on back
- Combine for complex multi-color designs
Custom Embroidery Patches
Once digitized, your design can become custom embroidery patches for specialized applications—uniforms, motorcycle clubs, military use, or premium merchandise.
Industry Standards & Best Practices
File Specifications
Quality digitizing services work to established standards:
- Maximum Stitch Count: Usually 500,000-1,000,000 stitches depending on equipment
- Color Limit: Typically 24-50 colors per design
- Recommended Size: 0.5″ x 0.5″ to 14″ x 14″ depending on application
- File Format: Multi-format delivery as standard
Digitizing for Different Garment Types
Hats & Caps
- Limited space, usually smaller designs
- Curved surfaces affect stitch angle
- Must account for seam placement
- 3D puff embroidery popular for caps
Polos & T-Shirts
- Most versatile application
- Left chest, full front, or back placement
- Larger designs possible
- Most common for corporate branding
Jackets & Outerwear
- Durable materials require dense stitching
- Shoulder placement affects design shape
- Professional appearance critical
- Multiple locations common
Patches & Specialty Items
- Custom embroidery patches require border stitching
- Backing affects final appearance
- Can be sewn or glued down
Pricing Factors in Embroidery Digitizing
What Affects Digitizing Cost?
- Design Complexity: Simple logos cost less than photorealistic designs
- Stitch Count: Extremely detailed designs require more digitizing time
- Size Requirements: Logos needed in multiple sizes may require re-digitizing
- Rush Orders: Faster turnaround commands premium pricing
- Revision Requirements: Complex clients may require multiple rounds
- Format Delivery: Standard formats cost less than exotic/specialized formats
ROI on Professional Digitizing
Consider this scenario:
- Poor digitizing: 10% defect rate on 500-piece order = 50 ruined garments
- Cost per garment: $8 (base cost)
- Ruined inventory cost: $400
- Professional digitizing cost: Usually $25-75
The math clearly favors professional services.
The Future of Embroidery Digitizing
AI & Automation
Emerging technologies are enhancing digitizing:
- AI-assisted design analysis
- Predictive thread color matching
- Automated underlay calculations
- Machine learning for stitch optimization
- 3D visualization before production
However, human expertise remains essential. AI handles routine optimization; experienced digitizers handle complex creative challenges.
Advanced Techniques
Modern digitizing includes:
- Gradient Stitching: Smooth color transitions
- Photographic Embroidery: Realistic image reproduction
- Dimensional Techniques: Layered, textured effects
- Specialty Thread Integration: Metallics, glow-in-dark, etc.
Getting Started With Professional Digitizing
The Process:
- Prepare Your Artwork
- Provide clear, high-resolution files
- Explain your vision and requirements
- Specify garment types and placement
- Get a Consultation
- Discuss feasibility
- Receive recommendations
- Get pricing and timeline
- Digitization
- Digitizer creates the file
- Initial proof is created
- You review and provide feedback
- Revisions
- Any adjustments are made
- Re-proofing as needed
- Unlimited revisions until satisfied
- Final Delivery
- Files provided in multiple formats
- Technical support and guidance
- Ready for production
Frequently Asked Questions About Digitizing
Q: How long does digitizing take? A: Simple logos can be digitized in 24 hours. Complex designs may take 3-5 business days. Rush services available.
Q: Can you digitize any image? A: Most images can be digitized, but some may require simplification or creative solutions.
Q: What’s the smallest design you can digitize? A: Designs as small as 0.5″ are possible, but details may be limited. Typically 1″+ recommended for complex work.
Q: Do I need to provide my image in a specific format? A: High-resolution images work best (300+ DPI). JPG, PNG, PDF all acceptable. Avoid low-resolution or heavily compressed files.
Q: Can you make my design bigger or smaller? A: Yes, but very large or very small scaling may require re-digitizing for optimal results.
Q: How many colors can I have? A: Most machines handle 10-24 colors easily. 50+ possible but becomes impractical for production.
Q: What if I’m not happy with the first result? A: Quality services offer unlimited revisions at no additional cost.
Conclusion
Embroidery digitizing is both an art and a science. What separates amateur results from professional quality comes down to expertise, testing, and refinement.
When you choose a professional digitizing partner, you’re investing in:
- Design expertise and creative problem-solving
- Technical mastery of embroidery equipment and software
- Quality assurance and testing processes
- Support and collaboration throughout your project
- Consistent, production-ready results
Whether you need custom embroidery digitizing for a single polo shirt or 10,000 branded caps, professional services ensure your vision becomes reality.
Ready to transform your designs into stunning embroidered products? Get a free quote today and experience the Rise Digitizing difference. Our expert team specializes in turning logos, artwork, and concepts into embroidery files that exceed expectations.