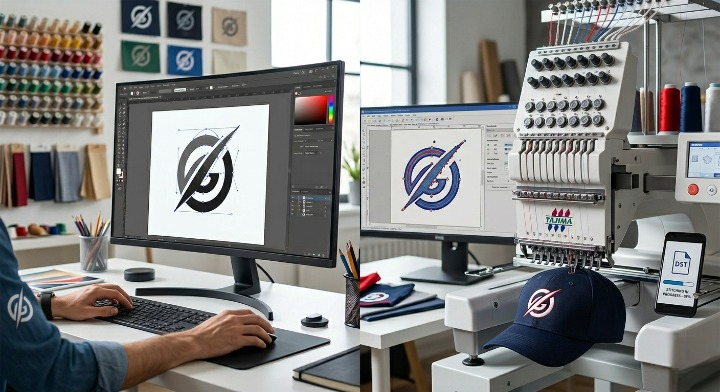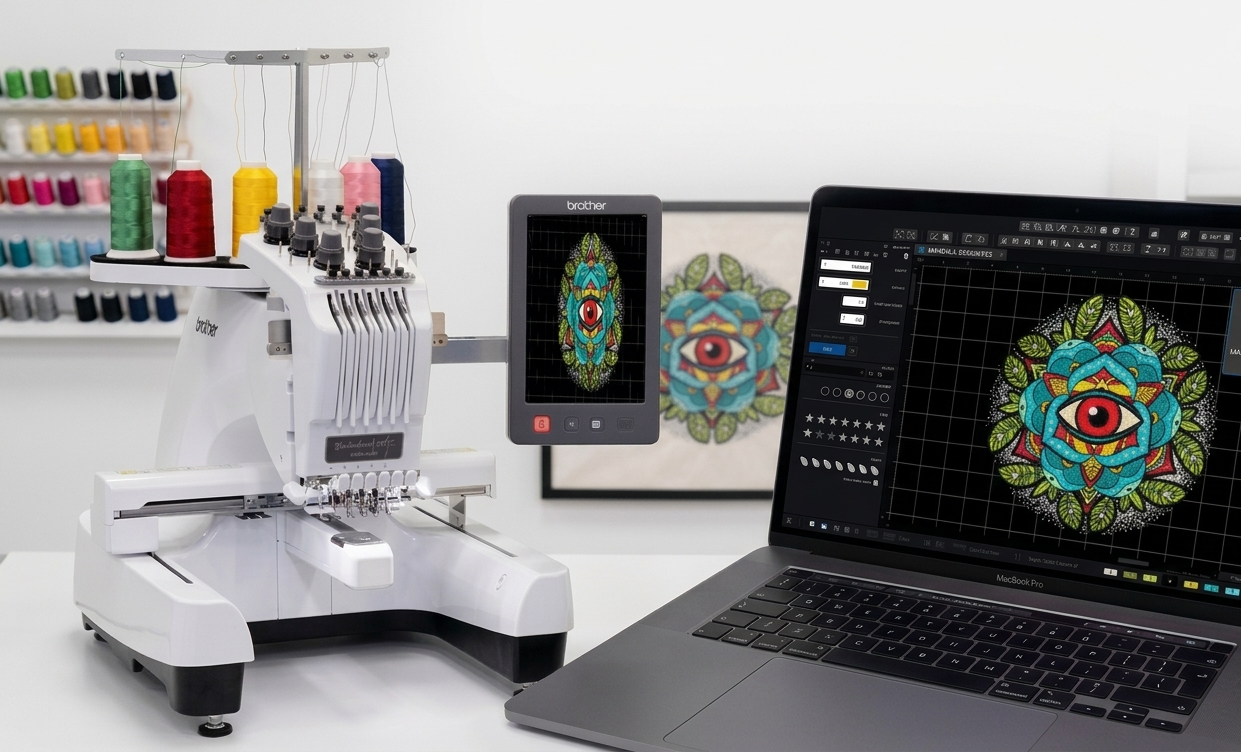
In today’s custom apparel and branding industry, the ability to convert vector to embroidery file format accurately is essential. Whether you’re working with logos, monograms, or detailed artwork, embroidery machines cannot read standard vector files like AI, EPS, or SVG directly. They require stitch-based formats such as DST, PES, JEF, or EXP.
Many businesses search for quick solutions, but quality embroidery digitizing is more than just automatic conversion. In this blog, we’ll explain how vector artwork transforms into stitch files, compare modern conversion approaches, and highlight what makes professional results stand out.
Understanding Vector to Embroidery Conversion
A vector file is made up of scalable paths and mathematical curves. These designs are ideal for printing because they maintain sharpness at any size. However, embroidery machines operate differently. They follow stitch commands — not paths.
When you convert vector to embroidery file, the artwork must be translated into:
- Stitch types (satin, fill, running stitch)
- Stitch direction
- Stitch density
- Underlay settings
- Thread color sequence
- Machine-specific file format
This process is known as embroidery digitizing.
Unlike simple file conversion tools, digitizing requires manual adjustments to ensure the design stitches cleanly on fabric without puckering, thread breaks, or distortion.
Why Vector Files Are Ideal for Embroidery
Vector files are actually the best starting point for embroidery digitizing because:
- They provide clean, scalable artwork
- Colors are clearly separated
- Edges are defined and precise
- Logos maintain detail at different sizes
Compared to raster images (like JPG or PNG), vectors reduce errors during stitch mapping. That’s why professionals prefer AI, EPS, or SVG formats when converting vector to embroidery file.
How the Conversion Process Works
Here’s a simplified step-by-step breakdown:
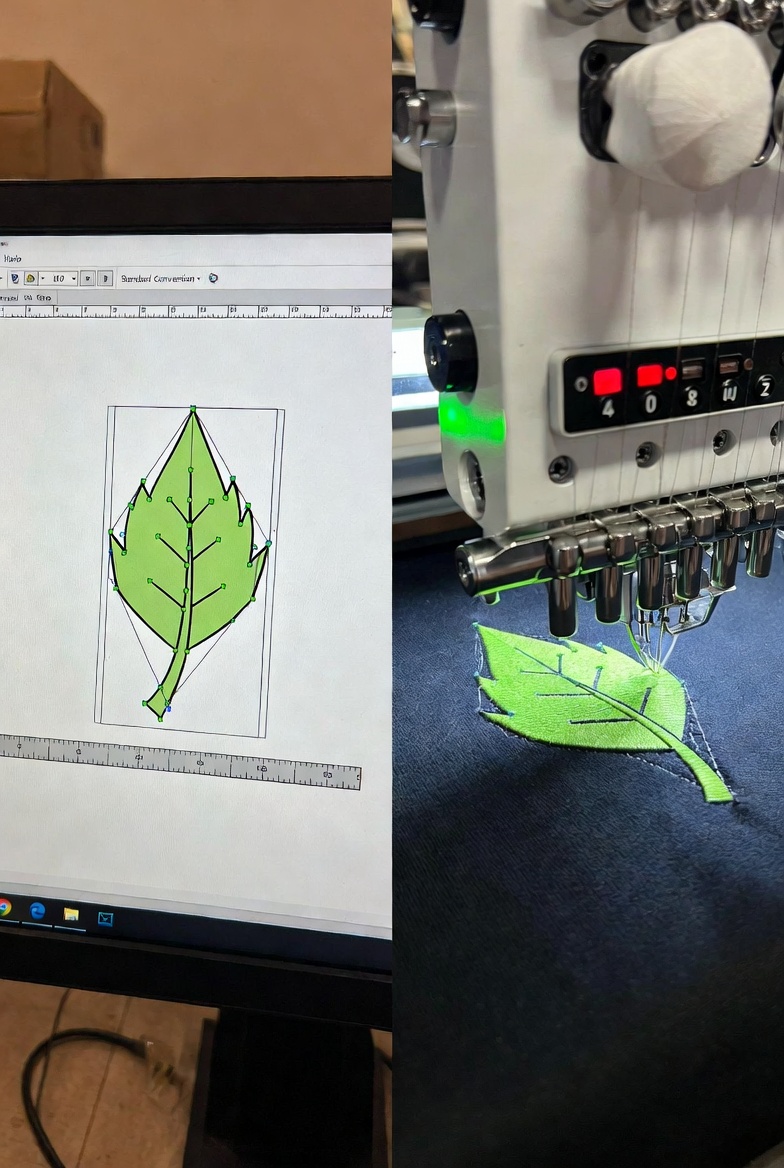
1. Design Analysis
The artwork is examined for small details, thin lines, gradients, or overlapping elements that may not stitch properly.
2. Stitch Type Assignment
Each section of the design is assigned a stitch type:
- Satin stitches for borders and text
- Fill stitches for large areas
- Running stitches for fine details
3. Stitch Direction & Density Setup
Proper stitch angles reduce fabric pull and improve appearance. Density is adjusted based on fabric type.
4. Underlay Creation
Underlay stitches stabilize the fabric and improve top stitch quality.
5. File Export
The final design is saved in a machine-readable format like DST or PES.
This process ensures a clean and production-ready embroidery file.
Comparison: Standard Conversion vs Professional Digitizing
Some blogs discuss how vector conversion impacts design quality, focusing mainly on visual refinement. However, embroidery digitizing goes deeper than visual alignment.
Here’s how professional digitizing differs:
| Basic Auto Conversion | Professional Digitizing |
| Automated mapping | Manual stitch planning |
| Limited stitch control | Custom stitch direction |
| No fabric adjustment | Fabric-based optimization |
| Risk of thread breaks | Balanced density & underlay |
While automated tools may offer fast results, they often ignore fabric behavior and machine settings. Professional services carefully plan every stitch for durability and clean finishing.
Common Mistakes When Converting Vector to Embroidery File
Many beginners rely on one-click conversion software, which can lead to:
- Excessively dense stitching
- Thread breaks
- Fabric puckering
- Poor text clarity
- Distorted shapes
High-quality digitizing prevents these issues by adjusting stitch length, pull compensation, and underlay techniques.
When Should You Convert Vector to Embroidery File?
You’ll need embroidery file conversion if:
- You have a logo in AI or SVG format
- You want to embroider company branding
- You need custom patches
- You’re preparing apparel for promotional use
- You run an embroidery business
Professional conversion ensures your brand identity remains sharp and consistent on fabric.
Benefits of Professional Embroidery File Conversion
Choosing expert digitizing services offers:
- Clean stitch results
- Optimized thread paths
- Reduced machine downtime
- Better durability
- Professional finishing
When you convert vector to embroidery file correctly, production becomes smoother and more cost-efficient.
FAQs
1. Can I directly use a vector file in an embroidery machine?
No. Embroidery machines require stitch-based files like DST or PES, not AI or SVG formats.
2. Is auto-digitizing software reliable?
It works for simple designs but may not produce high-quality results for detailed logos.
3. What is the best format for embroidery machines?
DST is widely used, but the required format depends on your embroidery machine brand.
4. Does fabric type affect digitizing?
Yes. Different fabrics require different stitch density and underlay settings.
5. How long does it take to convert vector to embroidery file?
Simple logos may take a few hours, while complex designs require more time for precision planning.
Final Thoughts
The process to convert vector to embroidery file is both technical and creative. While vector artwork provides a strong foundation, successful embroidery depends on expert stitch mapping, fabric understanding, and machine compatibility.
Unlike basic conversion discussions that focus only on design transformation, professional embroidery digitizing emphasizes stitch control, durability, and real-world production quality. If you want sharp, long-lasting embroidered results, manual digitizing remains the most reliable approach.
Investing in proper conversion ensures your logo doesn’t just look good on screen — it looks exceptional on fabric.