Introduction to PNG to JEF Conversion
Converting a PNG image into a JEF embroidery file is essential for anyone using Janome embroidery machines. A PNG to JEF converter helps transform digital artwork into machine-readable stitch files, allowing you to create high-quality embroidered designs on fabric. Whether you’re a beginner or a professional, understanding this process ensures clean, accurate, and professional results.
What is a JEF File in Embroidery?
A JEF file is a proprietary embroidery format used by Janome machines. It contains detailed instructions such as stitch type, direction, thread color, and design layout. Unlike PNG images, which are pixel-based, JEF files are stitch-based, meaning they guide the embroidery machine on how to sew the design precisely.
Why You Need a PNG to JEF Converter
PNG images cannot be directly used in embroidery machines. A converter or digitizing process is required to translate the image into stitches. This ensures:
- Accurate design replication
- Proper stitch sequencing
- Optimized thread usage
- Smooth embroidery output
Without proper conversion, designs may appear distorted or unprofessional.
How to Convert PNG to JEF (Step-by-Step)
1. Prepare Your PNG Image
Start with a high-resolution PNG file. Clean the image by removing unnecessary backgrounds and simplifying complex details. Clear and bold designs work best for embroidery.
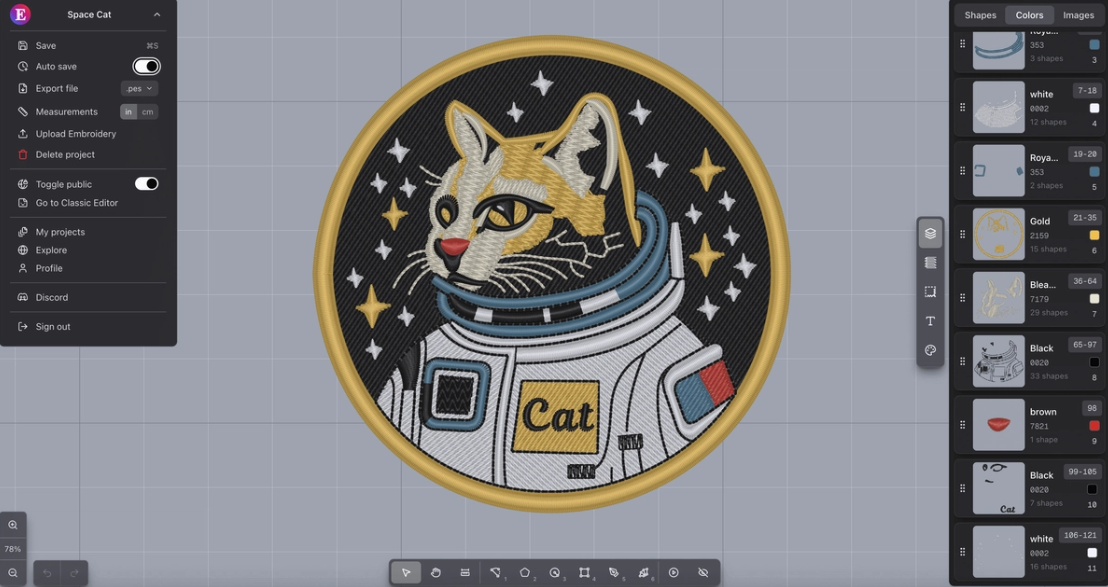
2. Use Embroidery Digitizing Software
Import your PNG file into embroidery software such as:
- Wilcom
- Hatch Embroidery
- Brother PE-Design
- Ink/Stitch (free option)
These tools allow you to convert or manually digitize the image into stitch patterns.
3. Digitize the Design
Digitizing is the most important step. You will define:
- Stitch types (satin, fill, run)
- Stitch direction
- Density and underlay
- Pathing for smooth stitching
Manual digitizing provides better results than auto-conversion tools.
4. Assign Thread Colors
Match the colors in your PNG image with embroidery threads. This step ensures your final design looks vibrant and accurate.
5. Export as JEF File
Once digitizing is complete, export the design in JEF format. This file is now ready to be used in Janome embroidery machines.
Best Tools for PNG to JEF Conversion
Choosing the right tool can significantly impact your results:
- Wilcom Embroidery Studio – Advanced and professional
- Hatch Embroidery – User-friendly and powerful
- Ink/Stitch – Free and open-source
- Embird – Affordable and efficient
Each tool offers unique features depending on your skill level.
Benefits of Using PNG to JEF Converter
- Create custom embroidery designs for personal or business use
- Produce long-lasting and durable designs
- Achieve professional-quality stitching
- Enhance branding with embroidered logos
This makes it ideal for apparel businesses, promotional products, and creative projects.
Common Mistakes to Avoid
- Using low-resolution PNG images
- Overcomplicating designs with too many details
- Ignoring stitch direction and density
- Skipping test runs before final production
Avoiding these mistakes ensures better embroidery results.
Tips for High-Quality Embroidery Output
- Keep designs simple and clean
- Use appropriate stitch types for different elements
- Test your JEF file on sample fabric
- Adjust settings based on fabric type
- Work with experienced digitizers for complex designs
PNG to JEF Conversion for Businesses
Businesses can use PNG to JEF conversion for branding purposes such as logos on uniforms, caps, and promotional merchandise. Embroidery adds a premium feel and long-lasting quality, making it a popular choice for corporate identity and fashion brands.
Conclusion
A PNG to JEF converter is more than just a tool—it’s a bridge between digital design and physical embroidery. By understanding the digitizing process, choosing the right software, and applying best practices, you can create stunning embroidery designs with precision and professionalism. Whether for personal projects or business use, mastering this process opens the door to endless creative opportunities.